- Best DIY Methods To Convert MiniDV to Digital
- MiniDV Camcorder
- Camcorder and Computer
- Camcorder and Computer with FireWire Card
- Camcorder and DVD Recorder
- Video Converter/capturing Device
- Using Professional Service for Converting MiniDV
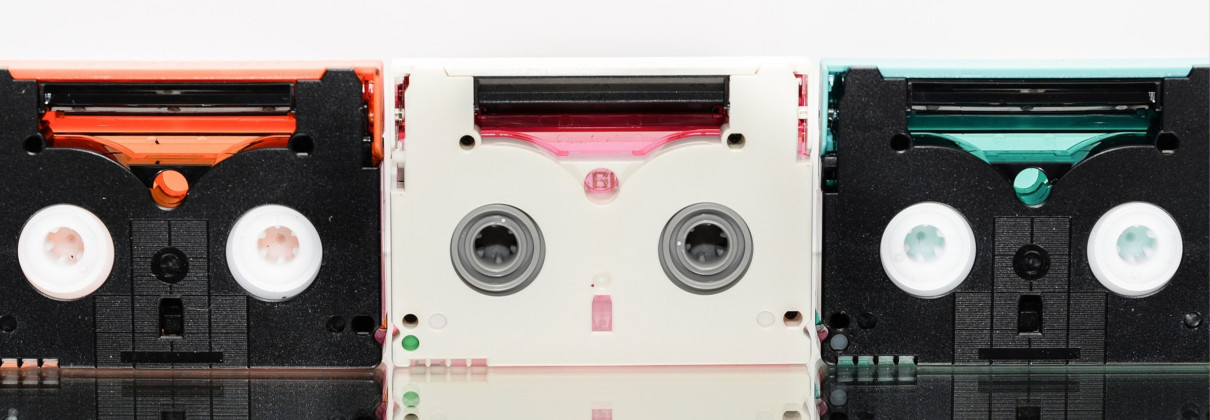
MiniDV tapes were introduced in 1995 and were mainly used for recording home movies. So it's normal to see them lying around your house. Also, Mini DV is among the last released videotapes before the start of digital video recordings stored on the external (micro DVD) and internal memory. So if you were thinking of converting tapes to digital, don't worry because there are plenty of solutions available.
We can group the process in two ways according to the conversion method: DIY and sending to a professional digitization service.
DIY requires technical knowledge, editing skills, time, and proper gear, such as old players and camcorders, video capture devices, and software, among other auxiliary equipment. On the other hand, professional services save you from technical mistakes (damaging or destroying tape), buying old players and camcorders.
Stick around and find out which solution works best for you and what you need to know. For a simple overview of the methods, see the table of contents.
Summary
No matter which method you use to convert MiniDV tapes to digital format, it's vital to keep in mind that the quality of the original tapes determines the quality of the output files. Therefore, if your MiniDV tapes are of low quality, your digital files will also be of low quality.
Some transfer services indeed offer enhancements and repairs which can improve your media quality but don't expect miracles.
If you don't know what you are doing, please don't start transferring on your own because you will probably damage or destroy the tape, which will lead to a permanent loss of footage. Instead, let the professionals do what they know best and save your memories in the best possible way.
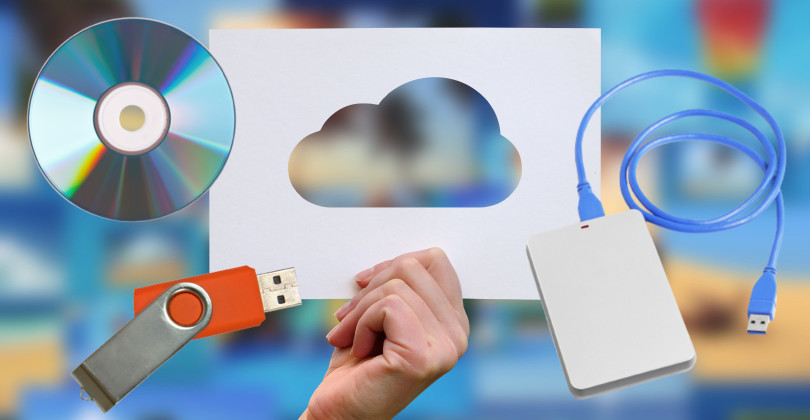
Moreover, it's always a smart move to create backups of your digital files to avoid losing your precious memories in case of computer crashes or other unexpected events. For instance, you can upload your files to cloud storage, and some cloud providers offer free storage of up to 50GB. This amount of storage is more than enough for most people.
Best DIY Methods To Convert MiniDV to Digital
You can convert mini DV tapes yourself if you have the right equipment in good working order. Here are some of the methods of converting to digital use:
- Camcorder
- Firewire Card for capturing video on a computer–price ranges from $20 to $50
- MiniDV player deck
- VCR or VCR combo that accepts MiniDV
- Video capturing device or video converter
DIY converting tapes to digital sounds easy, but it usually goes the other direction. Connecting different types of old devices gives you problems that are hard to figure out and take a ton of time before you even start.
MiniDV Camcorder
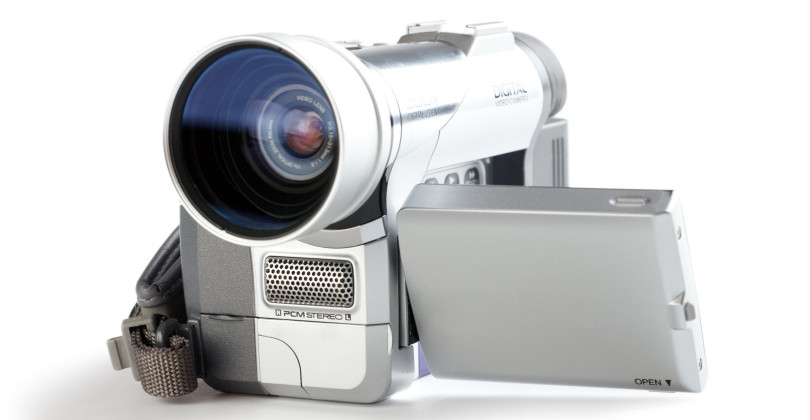
Converting Mini DV tapes to digital using a camcorder is one of the easiest ways. Having MiniDV tapes, you probably have your old camcorder, but if not, you need to get one. You would be surprised that you can still buy a brand new MiniDV camcorder on Amazon, and for used ones, there are plenty of options for around $100.
Equipment you'll need:
- Camcorder
- Cable ports you'll need: Mini USB to USB-A cable, and DV to USB-A cable
- Computer or laptop with USB-A port
- Video capture software
Converting Using Camcorder and Computer
Before you start, double-check the working condition of your camcorder before using any method listed. Then, find some test tape to see if the camcorder works properly to save your important tapes from damage.
Your computer needs at least one free USB-A port and software to capture played footage from the camcorder. During the research, we found one free software that may help you, VirtualDub.
Here are the steps on how to convert using camcorder and computer:
- Locate connection ports on your camcorder (usually, it's hidden with a cover)
- Using cable, connect your camcorder to the computer
- Set the camcorder to VCR mode
- Insert MiniDV tape to the camcorder
- Open video capturing software of your choice
- In the capture software menu, find and click "capture" and wait for the window to show up on the monitor
- On your camcorder, press "Play."
- After the last step, the video should appear, playing inside the capture window of your software.
- Then when the tape is finished playing, you can stop recording in the software.
Although your camcorder may have a mini USB connection, you won't be able to copy gigabytes of footage at a fast rate. It will take some time as Mini USB is meant more for photo transfer.
Advantages and Disandvatages of This Method
Converting your tapes to digital format using a camcorder and computer is the most convenient and popular method, with plenty of tutorials and guides available. However, there are several downsides to consider, including:
- Time-consuming and requires significant effort
- Potential loss of quality during the conversion process
- Compatibility issues may arise, requiring additional hardware or software
- More expensive than other methods, especially with the need for additional hardware or software
- Can be complex for those who are not tech-savvy, leading to frustration and delays in the process.
Converting Using Camcorder and Computer with FireWire Card

The Firewire cable is necessary for capturing high-quality video from your digital camcorder. You will find DV connectors on almost all camcorder models, providing you with the best possible footage capture. In addition, converting over the DV connection will allow you to capture the highest resolution that the camcorder can provide.
Equipment you'll need:
- Camcorder
- DV cable 4-pin to 6-pin (compare ports between devices)
- Firewire Card
- Computer
- Video capturing software on the computer
If you don't already have an installed Firewire card inside your computer, you can get one installed on your computer motherboard. Also, depending on the firewire card, you need to check for required drivers and install them so the card can work properly.
After these first steps, you must install and open video capturing software such as VirtualDub. There is also better premium software that is easier to configure depending on the type of camcorder you are using.
Here are the steps on how to convert using camcorder and computer with FireWire card:
- Connect your camcorder and computer/firewire card with DV cable (check cable pin heads)
- Set camcorder in VCR, VTR, or play mode (depends on camcorder model)
- Open video capturing software and find the camcorder source.
- Inside the capture software, press "capture/record."
- On the camcorder, press "play."
- When tape footage ends, stop the software capturing
Advantages and Disandvatages of This Method
Advantages of using a camcorder with a computer and a Firewire card to transfer MiniDV videotapes to digital:
- High-quality digital transfer
- It's a less expensive transfer option if you have the necessary hardware
- Real-time capturing and immediate editing
Disadvantages:
- Requires additional hardware that may be expensive and not universally compatible
- It can be time-consuming and challenging for non-tech-savvy individuals
- Compatibility issues may require additional hardware or software
- Possible risk of quality loss during the conversion
- Large file sizes can take up significant storage space on a computer or external hard drive.
Converting Using Camcorder and DVD Recorder
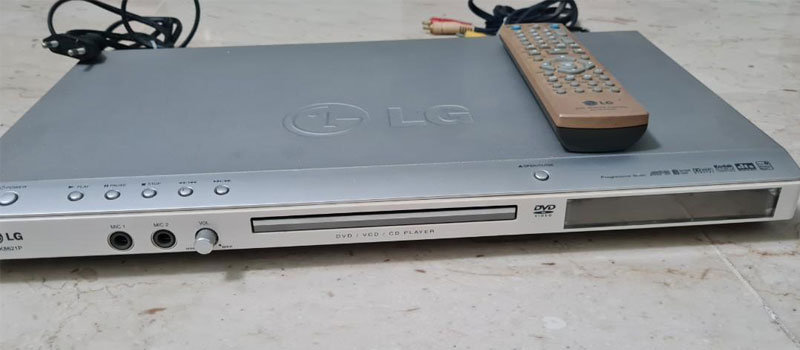
The simplest way to transfer your miniDV to digital form is onto a DVD via DVD recorder without any software.
Equipment you'll need:
- Camcorder
- DV cable 4-pin to 6-pin (compare ports between devices)
- DVD recorder
- Blank DVD
Check the DVD recorder if it's in working condition before starting the process.
Here are the steps on how to convert using camcorder and DVD recorder:
- Using the compatible DV cable type, connect the camcorder to the DVD recorder input port (most DVD recorders have labeled ports).
- Take a blank DVD, insert it into the DVD recorder, and wait until the DVD is fully loaded.
- Insert the MiniDV tape that you want to convert into a camcorder and select the input type that is used for the connection.
- Press play on the camcorder, and then press record on the DVD recorder.
- Footage will start playing, and at the same time, it gets recorded on the blank DVD that you inserted.
- With the completion of footage, stop the camcorder and the DVD recorder.
Advantages and Disandvatages of This Method
Advantages of using a camcorder and DVD recorder to convert MiniDV videotapes to digital format:
- It's a process that doesn't require much technical knowledge.
- No additional hardware or computer is necessary.
- DVD discs are a format that still can be played on most modern DVD players and computers.
Disadvantages:
- The quality may not be as good compared to direct digital transfer methods.
- DVDs are limited by their storage capacity.
- It can be more expensive than other methods, particularly if you need to purchase a DVD recorder.
- Editing capabilities are restricted in comparison to computer-based methods.
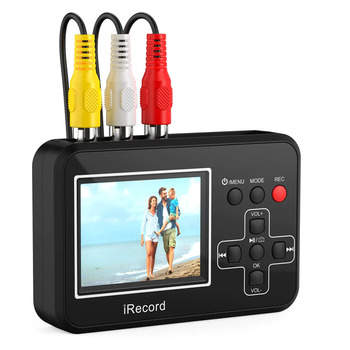
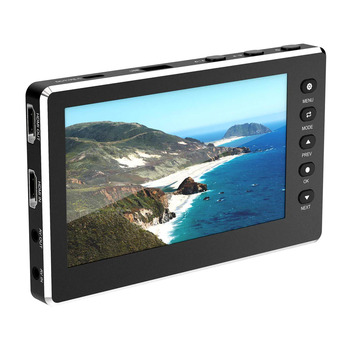
Converting Using a Video Converter/capturing Device
When you search for solutions for converting old tapes to digital, you will usually get results about video converters or video capturing devices. Unfortunately, video converters tend to have issues with drivers (usually models with RCA to USB type).
Still, luckily there is an easy way around it. Also, the cheaper converter you get, the more problems you will have, so if you plan to buy this kind of device, invest in a good one.
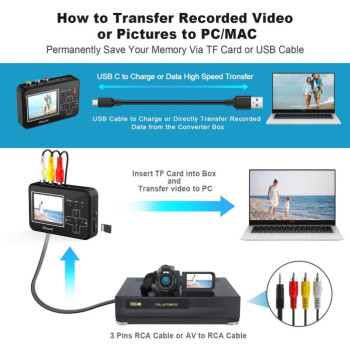
Equipment you'll need:
- Camcorder
- AV to RCA cable, or if the AV to RCA is female, then you need another RCA cable with a male connector on both ends (check if the cables are included with the device). Something to note here is that AV has a single pin, while RCA has three separate pins colored yellow, red, and white.
- Video converter/capturing device
- Depending on the video converter device, you are going to need a mini/micro USB cable or Micro SD card to be able to transfer footage to a PC/Laptop.
Here are the steps on how to convert using a video converter/capture device:
- Insert the memory card into the video capture device
- Connect the device to the charger and power it on
- On the camcorder, find the AV port and plug the AV cable end into it, and the other end of the cable connects to the capture device.
- Inside the device settings, find the video source and set it on AV (double-check the setting is applied). Select S-Video in the source if you have an S-Video cable connection instead of an AV to RCA. If everything is set properly, you should be able to see the camera's live view on your capturing device.
- On the camcorder, find the footage you want to convert and press "play," and immediately after that, press the "record or rec" on the capture device software to start capturing the footage. If information or a menu is displayed on the camcorder screen during playback, turn it off in the camcorder options so that we only see and record the footage.
- After the played footage ends, press stop on both the camcorder and capturing device.
- Check if the footage is successfully captured on the device, and then you can transfer it to other devices for editing or sharing.
If your camcorder and capturing device support an S-Video connection, use it instead of AV because of better picture quality.
Advantages of using a Video Converter/capturing Device to digitize MiniDV videotapes:
- It provides great quality capturing and conversion due to direct digital transfer from camcorder or player.
- Current video-capturing or converter devices are easy to use and offer high-quality footage capture.
- Real-time footage capturing
- Captured footage is stored on USB or SD card, ready for viewing and sharing online.
- You can view captured footage on tv or on the device itself.
Disadvantages:
- You need to purchase a video converter device if you don't own one.
- There may be compatibility issues with specific devices and operating systems.
- The transfer process can be time-consuming and complex because it captures footage in real-time.
Using a Professional Service for Converting MiniDV to Digital
You can send your MiniDV tapes to a digitization service without having the hassle of converting and editing audio/video quality. Instead, professional technicians do all the work for you. Besides videotapes, services also accept other types of media such as photos, slides, negatives, old films, and many more, depending on the service.
With professional video editing software, experienced staff, and high-quality equipment, they can produce a high-quality version of your videos that will not only meet but exceed your expectations. Although it comes with a price, it can be affordable depending on your chosen service.
iMemories Editors Choice | Legacybox | Memory Fortress | Costco Digitizing | Kodak Digitizing | |
 |  |  |  | ||
Website Link | |||||
Reviews Across Multiple Websites | Trustpilot: 4.7 out of 5 Sitejabber: 4.8 out of 5 Yelp: 3.5 out of 5 | Trustpilot: 2.0 out of 5 Sitejabber: 3.8 out of 5 Yelp: n/a | Trustpilot: n/a Sitejabber: n/a Yelp: 4.5 out of 5 | Trustpilot: 3.5 out of 5 Sitejabber: 1 out of 5 Yelp: 2.5 out of 5 | Trustpilot: n/a Sitejabber: n/a Yelp: n/a Facebook: 2.3 out of 5 |
Video Conversion | MiniDV, VHS, VHS-C, 8mm, Hi8, Digital 8, Betamax, MicroMini, DVDs, MiniDVDs | MiniDV, VHS, VHS-C, Hi8, Digital 8, MicroMV, Betamax, 8mm Video Cassette | MiniDV/HDV, VHS, VHS-C, Betamax, 8mm, Hi8, Digital 8, MicroMV | MiniDV, VHS, S-VHS, Betamax, VHS-C, S-VHS-C, Video8, Hi8, Digital 8, DV, DVCAM, DVC | MiniDV, VHS, VHS-C, Hi8, Video 8, Betamax, MicroMV, PAL, Digital 8 |
Film Conversion | 8mm, 16mm, Super 8 | 16mm, 8mm, Super 8, Regular 8 | 8mm | 8mm, Super 8mm, 16mm | 8mm, 16mm |
Photo Conversion | Photos, Negatives, Slides | Prints, 35mm Negatives, 35mm/126 slides | Lose photos up to poster size, photos in albums (non-scrapbooks), scrapbooks 35mm, Super 35mm, 35mm half frame, 110, 126, 127 | Prints from 2" x 2" to 8" x 12" | 35mm/126 slides, Prints, Negatives |
Audio Conversion | N/A | Reel to Reel, Audio Cassette, Micro-Cassette | N/A | N/A | Audio Cassette, Reel-to-Reel |
PRICING | |||||
Video Conversion Price | $14.99 per tape | $59.99 for 2 tapes $279.99 for 10 tapes $559.99 for 20 tapes $1099.99 for 40 tapes | Starting at $20.00 for one tape (DVD Deliverable) | Starting at $19.99 | $69.99 for 2 tapes $299.99 for 10 tapes $599.99 for 20 tapes $1199.99 for 40 tapes |
Film Conversion Price | $14.99 per 50ft. | $59.99 for 2 films $279.99 for 10 films $559.99 for 20 films $1099.99 for 40 films | Starting at $0.29 per foot | Starting at $19.99 | $69.99 for 2 films $299.99 for 10 films $599.99 for 20 films $1199.99 for 40 films |
Photo Conversion Price | $0.49 per photo | $59.99 for 2 sets of 25 pictures $279.99 for 10 sets of 25 pictures $559.99 for 20 sets of 25 pictures $1099.99 for 40 sets of 25 pictures | Loose Photos at 300 dpi $0.25 Loose Photos at 600 dpi $0.29 Photos in Album at 300 dpi $0.41 Photos in Album at 600 dpi $0.45 $0.75 per 35mm negative $1.79 per medium format (up to 3x3) | Starting at $19.99 | $69.99 for 2 sets of 25 pictures $299.99 for 10 sets of 25 pictures $599.99 for 20 sets of 25 pictures $1199.99 for 40 sets of 25 pictures |
Audio Conversion Price | N/A | $59.99 for 2 audio items $279.99 for 10 audio items $559.99 for 20 audio items $1099.99 for 40 audio items | $15 per audio | N/A | $69.99 for 2 audio items $299.99 for 10 audio items $599.99 for 20 audio items $1199.99 for 40 audio items |
Benefits of Using a Professional Digitization Service
Choosing professional care for your memories comes with great benefits, and it's the best approach, especially when you don't have a camcorder.
Some of the benefits of using professional service:
- It saves you from buying old equipment which is questionable whether it will work, which can be expensive
- No need to purchase any equipment or software and learn how to use it properly.
- You don't need to waste time solving unknown problems with old equipment.
- They save you from the risk of damaging or destroying your memories.
- Your tapes won't be destroyed, which may happen with DIY methods because of a lack of knowledge and working equipment.
- It saves you time, and you can go on with your everyday life.
- Your media is cared for, handled, and converted by professionals.
- You can choose the format of the digital file (depending on the service you choose)
- Your media can be repaired and enhanced to look better (depending on the service you choose)
Using professional services for digitizing MiniDV videotapes has its potential downsides, which include:
- Cost: Professional services can be more expensive than some other methods. Although they often offer deals and have discounts on larger orders.
- Time: The turnaround time for receiving digitized files from the service provider can vary, depending on the volume and media type. It can take from a few days to a couple of weeks to receive the files.
- Limited customization: While some professional services may offer options for custom labeling and file naming, there may be limitations to what you can request.
How a Professional Service Works
Most of them have a straightforward process from start to finish. After you make an order, you need to send tapes by mail. You can send it in a shipping kit (depending on service) or in your own box.
Note: If you're mailing tapes using your own box, make sure to use the sturdy or, even better crush-proof box. If your service of choice offers a shipping kit, we advise you to use one.
When tapes arrive in the facility, they will inform you. After that, you can follow the process of converting tapes to digital form. During the process, your tapes may receive repairs, and enhancements, which affect better video quality. With some services, this counts as an addon and may cost you some money. On the other hand, some companies like iMemories include this with every conversion free of charge.
They can transfer converted tapes on:
- DVD
- Blu-ray
- USB
- Digital file download
- External hard drive
- Cloud
The average turnaround time is 2-3 weeks, but it might take longer depending on the service and the amount of media you need to convert.
Price can also vary from service to service. For videotape transfer, the price can range from $12 to $35 per tape + a digital copy of your choice.
Overall in a short time, you will get your video tapes converted to digital with better video quality than you expected. In addition, you know that tapes are in safe hands and will be digitized and enhanced. So it's better to invest in a service that will do a professional job than in old equipment, which may do more harm than good.
Check out the comparison of our top recommended transfer services with good customer ratings. See which service can fulfill your expectations.
Finnal Words
The decision to use professional services for digitizing MiniDV videotapes will depend on your specific needs, budget, and risk tolerance. It's crucial to carefully evaluate these factors and research service providers before making a decision.
For the sake of your videotapes and other media, it's highly recommended to use professional digitizing services. Professional services have specialized equipment and experienced staff who can ensure a high-quality and safe transfer process. If you are not confident in your ability to digitize your tapes on your own, it's best to seek the assistance of professional services to avoid the risk of damaging or losing your original tapes.
In summary, before deciding to digitize your MiniDV tapes, make sure to consider all of the available options and do thorough research to find a reliable service provider that meets your specific needs.

Abdo is a Zoopy writer who loves spending his free time outdoors, camping, and enjoying the peace that nature brings. He also enjoys fixing things - he's particularly good with electronics. His favorite movie is I Am Legend, and he's fascinated by survival gear and safety.