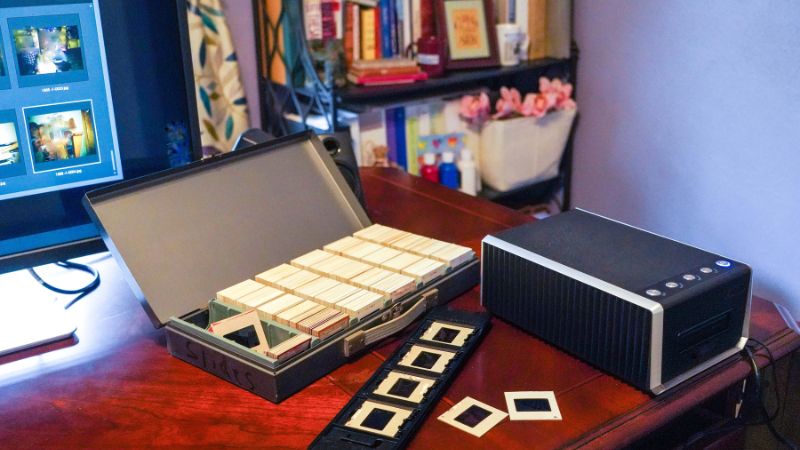
Converting your old slide photos into digital formats, enabling easy sharing and preservation, can be a time-consuming and potentially costlendeavor, especially if you rely on traditional photographic shops for the conversion.
If you find yourself in possession of a box of cherished slides and are eager to transform them into digital format to preserve and share them with your family, you may be wondering about the most effective and high-quality methods to achieve your goals. Look no further, as we've got you covered!
Within this comprehensive guide, we'll explore some of the top-notch solutions available for converting slides into digital formats. By staying with us, you'll be equipped to make an informed decision, selecting the perfect solution that caters precisely to your needs and preferences. Let's dive into the various options and find the ideal fit for your precious memories!
Warning: The Importance of Converting Slides to Digital
Converting your slides to digital is not merely a leisurely endeavor to be put off; it holds immense importance and should be treated as a top priority.
While slides may appear durable, their actual lifespan can be surprisingly short. Slides, negatives, and photo prints are crafted using chemicals that render them vulnerable to the effects of moisture, temperature fluctuations, and light exposure. Consequently, their longevity is contingent on careful handling and proper storage.
As time passes, images over 20 years old are susceptible to color distortion, increased graininess, and loss of intricate details. While optimal storage involves a cool and dark environment, even under these ideal conditions, slides will inevitably degrade over time. The most effective measure to safeguard them is, without a doubt, converting them into digital format. This step ensures their preservation and grants them a new lease of life.
| Method | Pros | Cons |
|---|---|---|
| Professional Company Service | High-quality results, convenient, time-saving, protective, enhancements, affordable pricing | Concern about potential loss or damage |
| Using a Dedicated Slide Scanner | Easy, high-quality, user-friendly screens, specialized slide holders, premium options | Higher cost for advanced models |
| Scanning on a Flatbed Scanner | Common, accessible, control over settings, format options | Requires clean scanner, specific holders, proper configuration |
| Converting Slides with a Digital Camera | Creative, versatile, slide duplicators, personal touch | Specific equipment needed, potential variability in quality |
| Capturing Photos from a Slide Projector | Unique, resourceful, cost-effective | Dependent on various factors, not the same quality level as other methods |
Best Choice: Professional Company Service
When it comes to converting your slides to digital format, settling for unknown amateur local services is not the wisest decision. Instead, opt for reputable companies with extensive experience, some of which have been in the industry for decades, mastering the art of converting slides to digital with finesse.
With the rising trend of transforming old media into digital format, these companies have evolved and now offer their top-notch services online. Yes, you heard it right – you can avail the best of the best from the comfort of your own home.
Wondering how it works?
Simply gather your slides, pack them securely, and send them to the company. From there, they take charge and perform the entire conversion process with utmost professionalism, ensuring high-quality results that exceed your expectations.
The perks of such a service are indeed remarkable. Firstly, you save a substantial amount of time, as manually scanning slides can be quite time-consuming. Moreover, entrusting experts with the task protects your slides from potential damage caused by improper handling, such as fingerprints leaving oils and dirt that degrade the image quality over time, or even scratches and cracks.
But wait, there's more! Professional scanning services offer a range of enhancements, elevating the final slide photos to a whole new level. Expect meticulous color corrections, removal of unsightly scratches and dust, precise cropping, red-eye removal, and an array of other improvements.
And here's the cherry on top: affordable pricing. Slide scanning costs can start as low as $0.21 per slide, depending on the specific service you choose. This means you can access expert assistance without breaking the bank.
iMemories Editors Choice | ScanMyPhotos | Legacybox | ScanCafe | |
 |  |  |  | |
Website Link | ||||
Shipping kit (box) | Yes | Yes | Yes | Yes |
Free repairs (splicing) | Yes | No | Yes | Yes |
Average turnaround time | 2-3 weeks | 4-8 weeks | 10-12 weeks | 3-4 weeks |
Expedited turnaround time | n/a | 2-4 weeks | 3-4 weeks | 10 days |
Reviews Across Multiple Websites | Trustpilot: 4.6 out of 5 Sitejabber: 4.7 out of 5 Yelp: 3.5 out of 5 | Trustpilot: n/a Sitejabber: 2.3 out of 5 Yelp: 3.5 out of 5 | Trustpilot: 3.0 out of 5 Sitejabber: 3.6 out of 5 Yelp: n/a | Trustpilot: 4.7 out of 5 Sitejabber: 2.5 out of 5 Yelp: 3.5 out of 5 |
WHAT FORMATS THEY CONVERT | ||||
Slide Conversion | Slides | 35mm, 110, 126, KODAK carousel | 35mm, 126mm | 35mm color slide |
Photo Conversion | Photos | 3x3” to 8x10” | Up to 8.5" x 11" | Up to 8"x10" |
Negative Conversion | Negatives | 35mm, APS, 120mm | 35mm negative | APS, Black & White |
Video Conversion | Betamax, VHS, VHS-C, 8mm, Hi8, Digital 8, MiniDV, MicroMini, DVDs, MiniDVDs | VHS, VHS-C, Mini DV, and Hi8 (Digital 8) | VHS, VHS-C, S-VHS, Betamax, Hi8, Digital8, Video8, MiniDV, MicroMV | BetaMax, Hi8, Digital8, Mini DV, VHS-C, S-VHS |
Film Conversion | 8mm, 16mm, Super 8 | 8mm, 16mm | 8mm, Super8, Regular, 16mm, Super16 | 8mm film, Super 8 film, 16mm film, 35mm movie film |
Audio Conversion | n/a | n/a | Reel to Reel, Audio Cassette, Micro-Cassette | Reel-to-Reel, Cassette tape |
PRICING | ||||
Slide Conversion Price | $0.49 per slide | Starting at $0.71 per slide ($25 minimum) | $59.99 for 2 sets of 25 pictures $279.99 for 10 sets of 25 pictures $559.99 for 20 sets of 25 pictures $1099.99 for 40 sets of 25 pictures | $0.44 per slide |
Photo Conversion Price | $0.49 per photo | Starting at $0.13 per scan ($25 minimum) | $59.99 for 2 sets of 25 pictures $279.99 for 10 sets of 25 pictures $559.99 for 20 sets of 25 pictures $1099.99 for 40 sets of 25 pictures | $0.44 per photo |
Negative Conversion Price | $0.49 per negative | Starting at $0.45 per negative ($25 minimum) | $59.99 for 2 sets of 25 pictures $279.99 for 10 sets of 25 pictures $559.99 for 20 sets of 25 pictures $1099.99 for 40 sets of 25 pictures | $0.44 per negative |
Video Conversion Price | $14.99 per tape | $19.95 per tape | $59.99 for 2 tapes $279.99 for 10 tapes $559.99 for 20 tapes $1099.99 for 40 tapes | $22.99 per tape |
Film Conversion Price | $14.99 per 50ft. | Starting at $0.19 per foot for 8mm, and 25¢ for 16mm | $59.99 for 2 films $279.99 for 10 films $559.99 for 20 films $1099.99 for 40 films | $0.30 per foot |
Audio Conversion Price | n/a | n/a | $59.99 for 2 audio items $279.99 for 10 audio items $559.99 for 20 audio items $1099.99 for 40 audio items | $22.99 per audio cassette |
In conclusion, when it comes to converting slides to digital, opting for the expertise of professional companies is undoubtedly the best choice. It ensures a seamless, hassle-free experience, with excellent results that breathe new life into your cherished memories.
4 DIY Techniques for Converting Slides into Digital Format
If you're keen on taking the DIY route for converting your slides to digital format, there are four distinct methods you can explore:
- Using a dedicated slide scanner
- Scanning on a flatbed scanner
- Capturing photos with a digital camera
- Capturing photos from a slide projector
Before delving into any of these methods, it's crucial to ensure your slides are cleaned thoroughly. Cleaning involves carefully removing dust and dirt to ensure optimal scan quality.
For the cleaning process, gather the following items:
- Cotton or nylon gloves to avoid fingerprints
- A standard microfiber cloth, preferably anti-static
- Pure alcohol cleaner without additives
- A can of compressed air
Avoid using water-based chemicals, and make sure to carry out the cleaning in a well-ventilated area. It's also advisable to conduct a test slide cleaning, perhaps using a less important shot, to ensure the effectiveness of the cleaning method.
The cleaning process itself is straightforward. Put on the gloves, take the dry cloth, and gently wipe across the slide in a straight line. Avoid applying unnecessary pressure. If dirt gets trapped in the edges of the frame, dispel it using the compressed air can.
Once your slides are pristine and free from debris, you're all set to begin the scanning process, capturing your cherished memories in digital form.
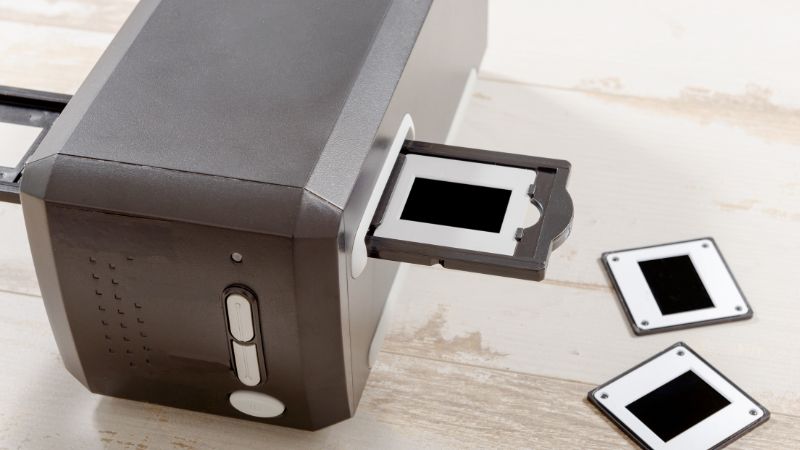
Converting Slides Using a Dedicated Slide Scanner
For an easy and high-quality slide conversion process, dedicated slide scanners are the way to go. These compact devices function as both scanners and digital converters, allowing you to achieve impressive results right from the comfort of your own home. In fact, after professional services, this is our second best-recommended method for slide conversion.
With a simple touch of a button, the image digitizer swiftly scans and transforms your precious old memories into sharp and vibrant digital images, conveniently saved in JPEG format.
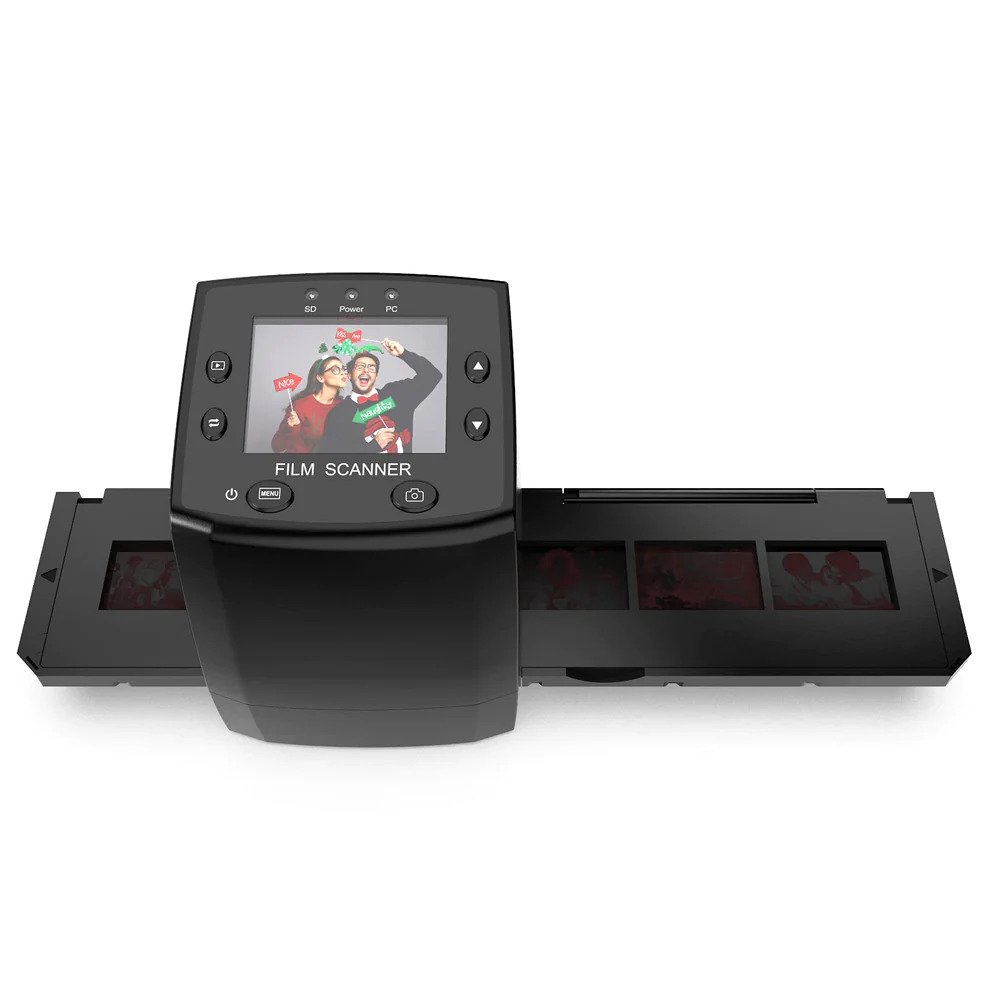
Most slide scanners come equipped with a user-friendly screen, enabling you to view and preview your slides before capturing them as digital photos. Once captured, the images are swiftly converted and securely stored in the internal memory or an external SD card.
Furthermore, these scanners often feature specialized slide holders, ensuring proper feeding and correct orientation during the scanning process.
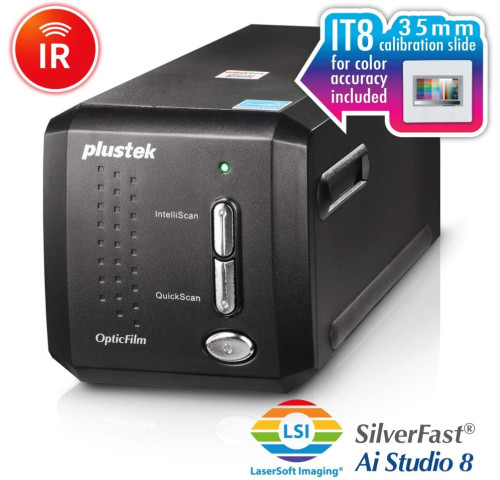
While standard slide scanners offer excellent performance, there are more premium options available with enhanced features, albeit at a higher price point. These advanced scanners are capable of capturing high-resolution digital photos and boast additional functionalities like dust and scratch removal, auto-adapted contrast, and increased dynamic range, resulting in even more detailed images. Moreover, they can accommodate various types of slides and negative films, making them an ideal choice for individuals with a multitude of media to be converted.
Kodak Slide N Scan | Kodak Mini | Wolverine | DigitNow | MagnaSonic | Pulstek 8200i Ai | |
 |  |  |  |  |  | |
Website Link | ||||||
Supported Types | 50 mm Slides (135, 110, 126) Color Negative Film (135, 110, & 126) Black & White Negative Film (135, 110, & 126) | Black & White, Negatives
| 35mm, 127 (1.5x1.5"), 126KPK, 110, APS Slides & Negatives | 35mm and 135mm Negative/Slide and Scans | 35mm film (36x24 mm), 135 slide (2x2”), 110 film (13x17 mm), 110 slide (2x2” and 1x1”), 126 film (28x28 mm), Super 8 film (8x4 mm) | 35mm Film & Slides |
Image Sensor | 14MP/22MP 1/2.33′′ CMOS sensor | 14MP ½.33” CMOS sensor | 20MP | 16MP | 14MP/22MP | Output 68.9MP |
Resolution | 4320x3252 | 4416x3312 | 5472x3648 | N/A | 3200x3200 and 4000x4000 | 7200x7200 |
Display | 5" | 2.4” LCD | 4.3" | 2.4" LCD | 2.4" TFT LCD | No |
Memory | SD card up to 32GB | SD card up to 32GB | Holds max. 40 images or optional SD/SDHC | 128MB built-in memory or SD card | 128MB built-in memory or SD card up to 32GB | N/A |
File Format | JPG | JPG | JPG | JPG | JPG | JPG |
TV Out | HDMI | NTSC/PAL | HDMI | Yes | N/A | N/A |
For a deeper dive into the world of dedicated slide scanners, explore our comprehensive buyer's guide on the best slide scanners available, and discover the perfect match for your needs. Embrace this hassle-free solution, and cherish your cherished memories in a modern digital format.
Scanning on a Flatbed Scanner
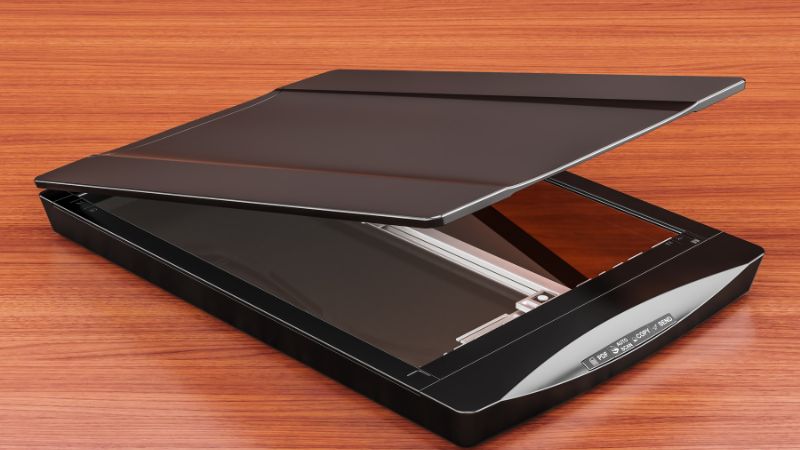
When it comes to scanning slides, one of the most common methods that come to mind is using a flatbed scanner. If you don't already have one, consider investing in a dedicated flatbed scanner rather than relying on a standard office printer/scanner for better results.
To embark on this method, you'll need the following essentials:
- Flatbed scanner
- Holder specifically designed for slides
Before you begin, it's essential to prepare the scanner by ensuring it is free from dust, dirt, and smudges. Utilize a clean microfiber cloth and a suitable glass cleaning spray to wipe down the entire scanner surface meticulously.
Once the scanner is clean and ready, set it up on your computer.
Open the scanner software and choose the option for scanning slides. From there, adjust the resolution, color mode, and contrast settings based on the quality and color of the slides you are working with. Opt for a higher resolution if you intend to enlarge the images significantly.
Once the scanner is appropriately configured, place the slides into its adapter, and gently lower the lid. Then, click the scan button on your computer to initiate the scanning process. Throughout the process, keep an eye on the results and make any necessary adjustments to the settings.
Upon completion of the scanning process, save the images in a format that suits your needs best, such as JPEG or TIFF. If desired, you can also edit the images to enhance their quality, straighten the orientation, or remove any imperfections.
Finally, store the slides in a secure box or a specialized slide storage system. Be sure to label them accurately for easy retrieval when needed, ensuring your precious memories remain well-organized and protected.
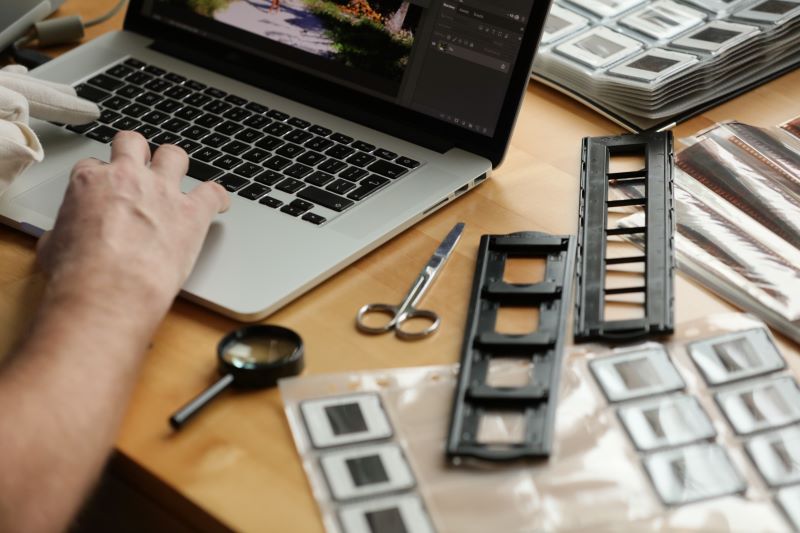
Converting Slide With a Digital Camera
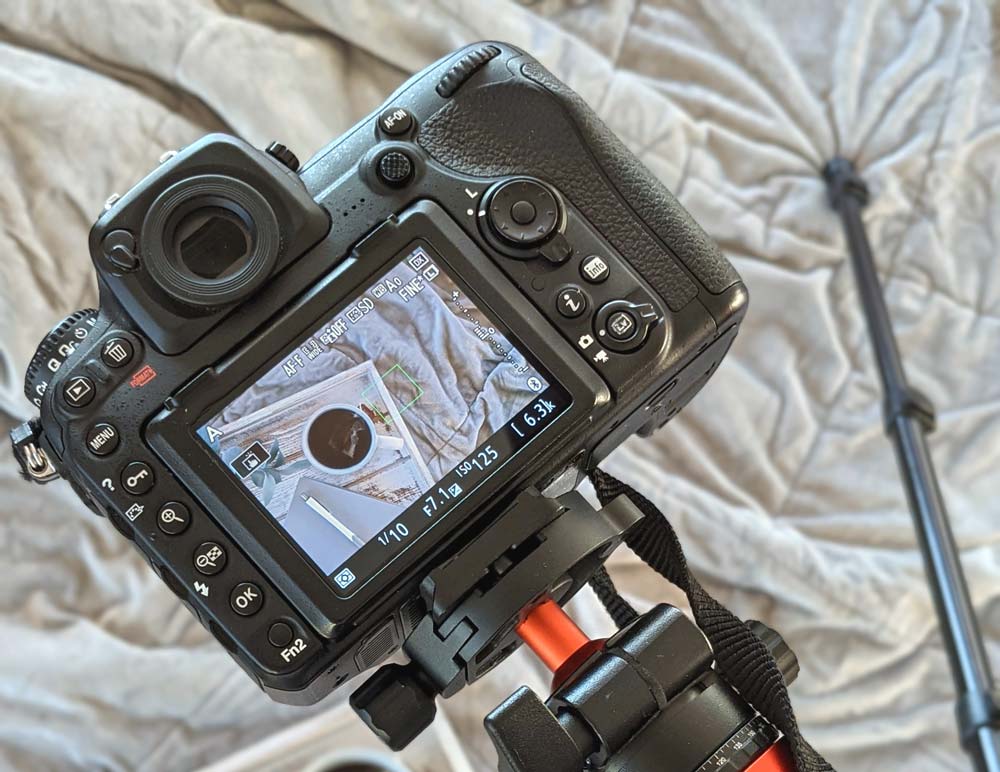
If you're an avid photography enthusiast and own a DSLR camera, this method of converting slides will appeal to your creative side.
To embark on this journey, you'll need the following equipment:
- Digital camera (preferably DSLR)
- Slide duplicator
A slide duplicator that matches your camera brand. These devices can be mounted on DSLR
cameras to photograph old slides, providing a perfect and high-definition copy of the image. They typically feature a slot to place slides, and once focused, they deliver outstanding results. The mount slot's end is usually equipped with opaque plastic to diffuse the light source effectively.
But wait, there's more to this method! It offers even greater versatility. If your DSLR camera has a video out feed, you can transform the slide duplicator into a slide viewer through your computer. This way, you can conveniently capture slides directly into the software or even record them as videos.
To execute this technique, you can purchase slide-scanning mounts designed for DSLR cameras from reputable photographic retailers. These mounts will serve as reliable companions on your slide conversion journey.
Alternatively, you can experiment with another method: crafting your own slide holder or clamping the slide in front of a light source and then capturing a photo using your camera. This approach allows for a touch of innovation and personalization in the conversion process.
So, if you have a passion for photography and a DSLR camera at hand, why not explore this creative method of slide conversion? It offers an excellent opportunity to engage with your artistic flair while preserving your precious memories in digital format.
Capturing photos from a slide projector
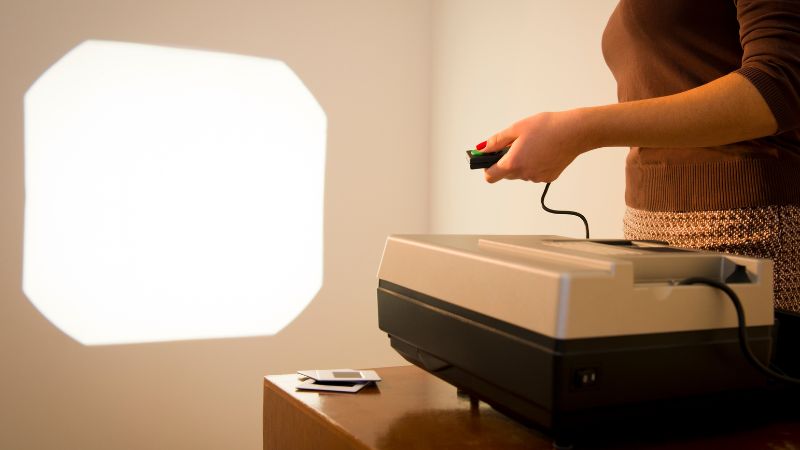
For a unique and resourceful method of digitizing slides, look no further than the trusty slide projector. While it doesn't necessarily need to be brand new (you can often find older models on platforms like eBay), it must be capable of projecting a clear image of the slide.
To achieve the best possible results, set up a white sheet or a dedicated projector screen and create a dark environment by blacking out your windows. Turn off all lights in the room, and for optimal stability, use a tripod to steady your digital camera.
Now, here's the process: Position the slide projector so that it projects the image onto the white sheet or screen. With the darkened background, the slide's image will stand out distinctly.
Using your digital camera, capture the projected image while ensuring the camera remains steady on the tripod. This method may not yield the same level of quality as the aforementioned techniques, but it offers a creative and cost-effective way to digitize your slides.
Keep in mind that the quality of the photos will depend on various factors, such as the condition of the slide projector, the camera's capabilities, and the lighting conditions. While the results may not be as pristine as other methods, this approach still presents a fantastic opportunity to preserve your cherished memories in digital format.
So, if you have an old slide projector lying around or manage to find one, why not experiment with this innovative technique?
Conclusion
After thoroughly analyzing various methods for converting old slides into digital formats, it becomes clear that each approach offers unique benefits and potential drawbacks. If time, quality, and preservation of the original slides are your priority, then investing in a professional company service is undoubtedly the most reliable and hassle-free method. The blend of professional expertise, high-end equipment, and meticulous enhancements ensure an exceptional outcome that will breathe new life into your cherished memories.
However, if you prefer a hands-on approach and wish to control the process, various DIY methods are available. From using a dedicated slide scanner to capturing photos with a digital camera, each option provides a unique experience. Among these, the use of a dedicated slide scanner stands out due to its balance between ease of use and the quality of digitized photos.
Ultimately, the best method depends on your personal needs, time availability, budget, and technical prowess. Therefore, we recommend exploring the options in-depth to find the best fit for your specific requirements and preferences.

Abdo is a Zoopy writer who loves spending his free time outdoors, camping, and enjoying the peace that nature brings. He also enjoys fixing things - he's particularly good with electronics. His favorite movie is I Am Legend, and he's fascinated by survival gear and safety.