- Summary
- Available Methods of Restoratio VHS Tapes
- Professional Restoration
- Digitization of VHS Tapes
- Restoration By Cleaning
- VHS Splicing Kit
- VHS Restoration Software
- Baking Method
If you've ever revisited your collection of old VHS tapes and other videotapes, you might have been disappointed by the diminished image quality, discoloration, scenes skipping, blurriness, and other issues. Fortunately, there are options available for video restoration that can help enhance the overall video quality.
In this guide, we will explore several methods to breathe new life into your old VHS tapes and ensure their preservation for the future.
However, it's important to note that video restoration is not a magical process. The goal of restoration is to improve the quality of the final product compared to the original source. The outcomes will vary depending on various factors, as discussed below. While some projects may yield remarkable improvements, others might only exhibit minor enhancements.
Summary
Preserving memories stored in VHS tapes can be done through various methods, each offering distinct advantages. However, quality restoration is primarily influenced by the condition of the original tapes. If your VHS tapes are severely damaged or degraded, they may require professional restoration services. Professionals have advanced tools and expertise to handle severe damage and restore your precious memories optimally.
For those who prefer a hands-on approach, DIY digitizing is a viable option. It involves the use of a VHS-to-Digital converter or a VHS/DVD recorder. While this method allows for personalized control over the process, it requires careful handling of the tapes and familiarity with the equipment.
Post-digitization, using restoration software, can be a great way to improve video quality. It offers tools to correct common issues like noise, color degradation, and shaky footage. However, it's essential to understand that software capabilities are limited and can't fully restore severely degraded tapes. In addition, it requires a basic understanding of video editing, and the results can vary based on the original tape's quality and the software used.
In conclusion, professional restoration services offer the most reliable results for severely damaged tapes. For minor damages or if you're comfortable with the process, DIY digitization followed by software restoration can help you preserve and enhance your valuable VHS content. Remember, regular backups of your digitized files are crucial for safeguarding your memories from unforeseen circumstances. Cloud storage providers offering free or affordable plans can be an excellent solution for this.
Available Methods for Restoration of Old VHS Tapes
| Methods for Restoration of Old VHS Tapes | Difficulty | Knowledge Required |
|---|---|---|
| 1. Professional Restoration Service | Low (for the person whose tapes are being restored) | Minimal. You need to know enough to choose a reputable company and understand what they offer. The difficulty and knowledge required for the professionals doing the restoration, of course, is very high. |
| 2. Digitization | Moderate to High, depending on whether you are doing it yourself or using a service. | If using a service, minimal. If doing it yourself, you will need some technical knowledge about how to use the digitization equipment and software. Some basic understanding of video formats and file management is also helpful. |
| 3. Cleaning with a VHS Cleaning Kit | Easy | Minimal. You just need to follow the instructions that come with the cleaning kit. |
| 4. Repairing with a Splicing Kit | Moderate to High | Some understanding of how VHS tapes work and manual dexterity is needed. It can be a delicate process and mistakes can permanently damage the tape. |
| 5. Using Restoration Software | High | A strong understanding of video formats and editing software is required. Experience with video editing or restoration would be very helpful. |
| 6. Baking | High | You need to understand the process and risks involved thoroughly, as the chances of damaging the tape are high if not done correctly. It's also essential to know when a tape has "sticky-shed syndrome" and when baking is the appropriate method. |
| Note: Always remember that if you are unsure about any of these processes, it's best to seek professional help. The risk of permanently damaging the tapes increases when trying to restore them without the proper knowledge or tools. | ||
1) Professional Restoration of Old VHS Tapes
If you lack experience or the necessary equipment to repair your old VHS tapes, opting for professional restoration services is the ideal solution. Fortunately, there are numerous companies available both locally and online that offer such services.
By choosing professional video restoration services, you can ensure that your tapes are handled with care and expertise, minimizing the risk of damaging them and potentially losing precious footage forever. These services utilize top-quality equipment and advanced techniques to restore VHS tapes to their optimal condition.
The process involves a comprehensive approach, including repairing damaged cassette boxes, cleaning and splicing the tape, reducing tracking lines, enhancing color, and more. These experts are well-versed in improving the resolution and video quality of your tapes while safeguarding your cherished memories. They can address various issues, such as lubricating the reels, repairing mold and mildew, combating humidity, and even untangling snarled magnetic tape. Moreover, they typically accept a wide range of videotape formats, including VHS, VHS-C, S-VHS, Betamax, MiniDV, and more.
Currently, there are popular online companies that offer professional restoration services through convenient box kits. When you place an order for your specific media, such as VHS tapes or other accepted videotape formats, the service will send a comprehensive shipping box kit to your doorstep. Once you receive the kit, simply pack your VHS tapes securely and return them to the service for restoration and conversion to a digital format.
Best VHS Transfer Services Comparison Table
Service | Editors Choice iMemories  | Legacybox  | Memory Fortress | Southtree  | Costco Digitizing  | ScanMyPhotos  | DigMyPics MemoryBox  | Kodak Digitizing  |
Website Link | ||||||||
Shipping kit (box) | Yes | Yes | No | Yes | No | Yes | Yes | Yes |
Free repairs (splicing) | Yes | Yes | No | Yes | Yes | No | Yes | Yes |
Average turnaround time | 2-3 weeks | 10-12 weeks | 1-2 weeks | 10-12 weeks | 3-4 weeks | 4-8 weeks | 2-4 weeks | 10-12 weeks |
Expedited turnaround time | n/a | 3-4 weeks | n/a | n/a | n/a | 2-4 weeks | n/a | n/a |
ONLINE REVIEWS | ||||||||
4.6 | 4.0 | n/a | n/a | n/a | n/a | n/a | n/a | |
4.7 | 3.5 | n/a | 3.6 | n/a | 2.3 | 5.0 | n/a | |
4.0 | n/a | 4.0 | 2.6 | 2.0 | 3.5 | n/a | n/a | |
4.4 | n/a | 5.0 | n/a | n/a | n/a | 4.1 | 2.0 | |
WHAT FORMATS THEY CONVERT | ||||||||
Video tapes | Betamax, VHS, VHS-C, 8mm, Hi8, Digital 8, MiniDV, MicroMini, DVDs, MiniDVDs | VHS, VHS-C, Mini-DV, Hi8, Digital 8, MicroMV, Betamax, 8mm Video Cassette | VHS, VHS-C, Betamax, Hi8, Digital 8, 8mm, MiniDV, MicroMV | VHS, VHS-C, MiniDV, Hi8, Digital 8, MicroMV, Beta, PAL to NTSC | VHS, S-VHS, Betamax, VHS-C, S-VHS-C, Video8, Hi8, Digital 8, DV, DVCAM, MiniDV, DVC | VHS, mini VHS, VHS-C, Hi8 NTSC format tapes | VHS, VHS-C, Hi8, Video 8, Digital 8, MiniDV, Betamax | VHS, VHS-C, Hi8, Video 8, MiniDV, Betamax, MicroMV, PAL, Digital 8 |
Film | 8mm, 16mm, Super 8 | 16mm, 8mm, Super 8, Regular 8 | 8mm | 16mm, 8mm, Super 8 | 8mm, Super 8mm, 16mm | 8mm, 16mm, Super8 | 8mm, Super 8, 16mm | 8mm, 16mm |
Photos | Photos, Negatives, Slides | Prints, 35mm Negatives, 35mm/126 slides | Photos, negatives, slides | Prints, Slides, Negatives | Prints from 2" x 2" to 8" x 12" | Photos, slides, negatives | Prints, negatives, slides | 35mm/126 slides, Prints, Negatives |
Audio | N/A | Reel to Reel, Audio Cassette, Micro-Cassette | N/A | Cassette, Reel to Reel | N/A | N/A | Cassette tape, reel to reel tape | Audio Cassette, Reel-to-Reel |
PRICING | ||||||||
Video Conversion Price | $14.99 per tape | $59.99 for 2 tapes $279.99 for 10 tapes $559.99 for 20 tapes $1099.99 for 40 tapes | Starts at $20 per tape but gets cheaper the more you add | $15 per tape | Starting at $19.99 | $19.95 per tape | $65 - $600 (depends on the package size) | $69.99 for 2 tapes $299.99 for 10 tapes $599.99 for 20 tapes $1199.99 for 40 tapes |
Film Conversion Price | $14.99 per 50ft. | $59.99 for 2 films $279.99 for 10 films $559.99 for 20 films $1099.99 for 40 films | $0.29 per foot | $25 per film | Starting at $19.99 | Starting at 19¢ per foot for 8mm, and 25¢ for 16mm | $65 - $600 (depends on the package size) | $69.99 for 2 films $299.99 for 10 films $599.99 for 20 films $1199.99 for 40 films |
Photo Conversion Price | $0.49 per photo | $59.99 for 2 sets of 25 pictures $279.99 for 10 sets of 25 pictures $559.99 for 20 sets of 25 pictures $1099.99 for 40 sets of 25 pictures | Starts at $0.38 per photo but gets cheaper the more you add | $0.25 per photo | Starting at $19.99 | Starting at 13¢ per scan ($25 minimum) | $65 - $600 (depends on the package size) | $69.99 for 2 sets of 25 pictures $299.99 for 10 sets of 25 pictures $599.99 for 20 sets of 25 pictures $1199.99 for 40 sets of 25 pictures |
Audio Conversion Price | N/A | $59.99 for 2 audio items $279.99 for 10 audio items $559.99 for 20 audio items $1099.99 for 40 audio items | N/A | $15 per audio | N/A | N/A | $65 - $600 (depends on the package size) | $69.99 for 2 audio items $299.99 for 10 audio items $599.99 for 20 audio items $1199.99 for 40 audio items |
Depending on service, VHS tape goes through processes such as:
Inspection and Cleaning
They will first inspect your VHS tape for any physical damage, dust, or dirt. If the tape needs cleaning, they'll clean it using specialized equipment to ensure that it can be played without causing damage.
Repair (if needed)
If your tape is damaged (for example, the tape is crinkled or broken), they may be able to repair it, although there could be an extra charge for this service.
Playback and Digitization
They will play your tape in a VHS player that is connected to a computer or a digital recording device. The analog signals from the VHS tape are converted into digital data during playback. The result is a digital video file that can be stored on a computer, DVD, or another digital storage medium.
Quality Check and Enhancement
After the digitization process, they will review the quality of the video. Some services offer video restoration, where they will adjust the brightness, contrast, or color balance, or reduce the appearance of damage or artifacts in the video.
Encoding and Output
The digital video file is then encoded in a common video format like MP4 or AVI, or burned to a DVD, converted to USB etc., depending on what service you've requested. Some companies can also upload the digital video file to a cloud storage service so you can download it or share it online.
Return of Original and Delivery of Digital Copy
After the process is completed, they will return your original VHS tape along with the digital copy. Some services also provide a tracking service so you can follow the process of your order and be informed with each step.
Be sure to research different services and find one that suits your needs and budget. Prices, turnaround times, and the quality of digitization can vary. It's also important to ensure that the service will handle your tapes with care and return them to you after digitization.
In essence, this is the most straightforward, secure method that you can apply to your VHS tapes and any other form of media.
2) Restoration By Digitizing Old VHS Tapes
Digitizing old VHS tapes can be a relatively straightforward process, especially when using a professional service, as previously mentioned. However, suppose you choose to do it yourself. In that case, it's important to have some technical knowledge of the required equipment and software, as well as a basic understanding of video formats and file management.
One of the simplest DIY methods involves using a VHS-to-digital converter. This device captures the footage as it is played on a VCR. Another option is using a VHS to DVD recorder, which acts as both a VCR player and a DVD recorder, allowing you to play the VHS tape and record it onto a DVD.
Best VHS to Digital Converters
DigitNow HD Video Capture Box | DigitNow VHS to Digital Converter | DigitNow VHS to Digital Converter Box | DigitNow USB 2.0 Video Capture | |
Editors Choice  | 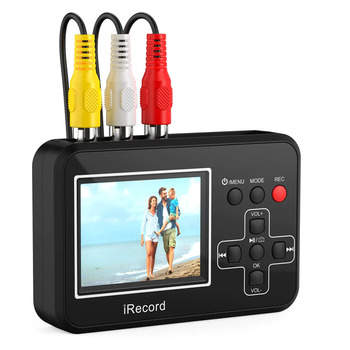 |  |  | |
Website Link | ||||
Price | $169.99 | $84.99 | $ 179.99 | $49.99 |
Description | The DigitNow HD Video Capture Box is a versatile converter that supports AV and HDMI HD 1080P video input and output. It features 3.5mm video input and output ports and comes with built-in speakers for audio and video preview. You can save your converted videos on a USB flash drive or SD card (up to 128GB) formatted as FAT32 or exFAT. This converter allows you to capture HD 1080P video from various sources, including VCRs, VHS tapes, Hi8, camcorders, DVDs, TV boxes etc. It also includes a convenient 5" OLED screen for easy video playback. | The DigitNow VHS to Digital Converter offers a user-friendly one-touch operation for converting your videos to digital files. With this converter, you can easily restore and share your family memories from the past. It allows you to share your digitized videos on your PC, smartphone, or TV. | The DigitNow VHS to Digital Converter provides HD 1080P video capture and recording from various sources, including VCRs. It features a 5" OLED screen for convenient video preview and playback. | The DigitNow USB 2.0 Video Capture is an all-in-one pro version designed for converting old VHS tapes into digital files. It supports video output formats such as MJPEG-19201080@30Hz and YUV422-720576@25Hz. The converter comes with powerful editing software for easy editing and burning of DVD formats. |
While these DIY methods may seem convenient, it's important to note that the results may not be on par with those achieved through professional services, which offer additional features and quality enhancements. There are also certain risks involved:
| Risks |
|---|
| Damage to the VHS tape: VHS tapes are fragile, and mishandling or using old or unclean equipment can cause damage. For instance, a misaligned or dirty VCR head can scratch or crinkle the tape. |
| Quality loss: Without the proper equipment and expertise, the conversion quality may not be optimal. Professional services utilize high-quality converters and enhancement techniques to improve both image and sound quality. |
| Equipment cost: Purchasing the necessary equipment, such as a VCR player, digitizer, and potentially video editing software, can be more expensive than utilizing a professional service, particularly if you only have a few tapes to convert. |
| Technical difficulties: The conversion process can be complex, and troubleshooting issues can be challenging if you are unfamiliar with video technology. Common problems include difficulties with digitizing software, issues with video codecs, or struggles with burning digital files to DVD. |
| Time-consuming: Converting tapes can be time-consuming since they need to be played in real-time during the process. For instance, a two-hour tape will take at least two hours to convert, excluding setup time, troubleshooting, and any additional video enhancements. |
| Copyright issues: If the tapes contain copyrighted material, creating a digital copy could potentially infringe on copyright laws. It's important to consider the legal implications before making digital copies of copyrighted content. |
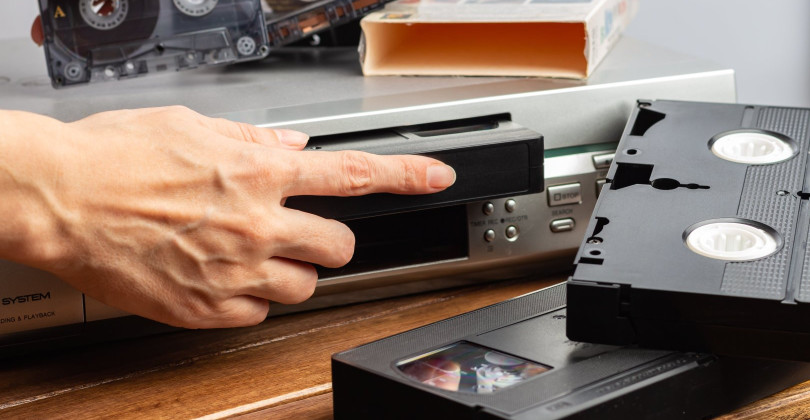
3) Restoration By Cleaning with a VHS Cleaning Kit
Dust accumulation inside VCRs and on VHS tapes can significantly impact picture quality and cause playback issues. To combat this problem, regular cleaning is essential. While there are self-cleaning tapes available, professionals often discourage their use due to claims of ineffective cleaning and potential damage to tape heads. The most effective way to clean your VCR is by manually cleaning it. Here's a breakdown of the process:
VCR Cleaning
- Open the VCR casing using a screwdriver, taking care to follow any specific instructions mentioned in the user manual or indicated on the casing seal or sticker.
- Apply a small amount of isopropyl alcohol to a Q-tip.
- Gently swab the casing and the inside of the empty reel using the Q-tip. This helps remove mold, dirt, and dust. Be cautious and avoid excessive moisture.
VHS Tape Cleaning (Electronic Cleaner Method)
- Remove the tape from the VCR.
- Follow the instructions in the VHS tape cleaner manual to ensure correct usage, as procedures may vary between models. Electronic cleaners are generally safe and gentle, making them an easy option for cleaning old VHS tapes.
VHS Tape Cleaning (Manual Method)

- Wear clean cotton gloves to prevent fingerprints and further contamination.
- Lift the top side flap of the tape casing, exposing the tape running from one reel to the other.
- Carefully pull out approximately 12 inches of tape.
- Use a cotton cloth or tissue to gently wipe the exposed tape. Avoid using any liquid, as it can damage the tape.
- After cleaning, carefully spin the reels with your finger to guide the tape back into place.
It's important to note that manually cleaning VHS tapes carries some risk, as mishandling can damage the tape. Exercise caution and handle the tape with care throughout the cleaning process.
By following these cleaning methods, you can help improve the longevity and performance of both your VCR and VHS tapes. In addition, regular maintenance and cleaning can contribute to better picture quality and smoother playback.
4) Restoration Using VHS Splicing Kit
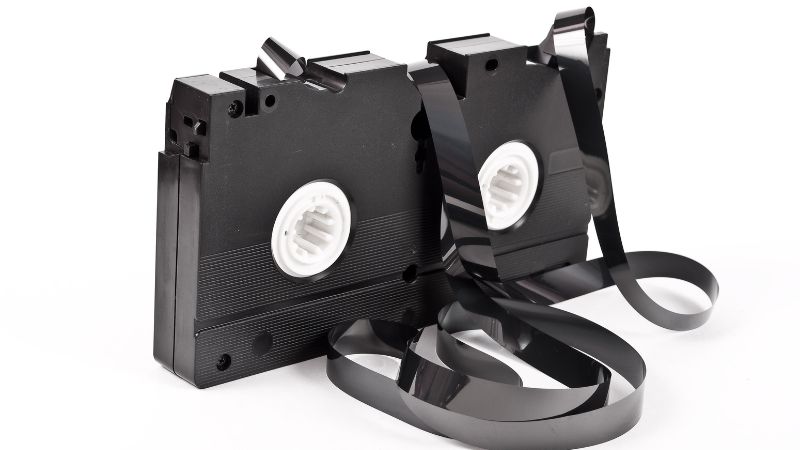
A VHS splicing kit is a collection of tools specifically designed to repair physical damage to VHS tapes, primarily by splicing together two broken ends of the tape. This kit is useful for fixing tapes that have been accidentally cut, broken, or crinkled.
A typical VHS splicing kit includes the following components:
Splicing Block
This block features a slot that securely holds the tape in place during the repair process. It is equipped with grooves at different cutting angles, ensuring precise and accurate cuts at the correct positions.
Splicing Tape
This special tape is used to join the two ends of the broken tape together. It is designed to be thin, flexible, and capable of withstanding the conditions inside a VHS cassette. The splicing tape should not interfere with the VHS player's reading of the tape and can tolerate the heat generated during fast-forwarding and rewinding.
Cutting Tool
Typically, a razor blade is included in the kit for trimming the ends of the broken tape. This cutting tool ensures that the ends are cleanly cut, with straight edges and the appropriate angle for a successful splice.
To use a splicing kit, you would open the VHS cassette shell, remove the damaged section of the tape, and then splice the two intact ends together using the splicing block and tape. It is important to note that a splicing kit can only repair the physical tape; it cannot restore any video or audio data that was lost due to the cut-out section.
It is crucial to remember that while a splicing kit can address minor physical damage to VHS tapes, it is not suitable for improving video or audio quality or handling severe physical damage. For such cases, professional restoration services are recommended.
5) Using VHS Restoration Software
Video restoration software can be a valuable tool for improving the quality of videos digitized from VHS tapes. It helps to address various issues and defects commonly found in old videos, such as flicker, line scratches, color degradation, stains, dust, noise, burned frames, and dead pixels.
Once you have a digital file of the VHS video, you can import it into dedicated video restoration software or a general-purpose video editing application with restoration features. The software offers a range of processes to enhance the video quality, including:
- Noise Reduction: Reducing graininess or "snow" in the video, a common issue with VHS tapes.
- Stabilization: Correcting shaking or jittering caused by problems during the VHS tape digitization process.
- Color Correction: Restoring faded or unbalanced colors to their original appearance.
- Brightness and Contrast Adjustment: Improving overly dark, washed out, or high-contrast videos.
- Sharpening: Enhancing the detail lost in VHS videos.
After applying the desired restoration processes, you can export the video by encoding it into a new digital file. Most software allows you to choose the format and quality of the exported video.
It's important to note that restoring VHS tapes using software can be a complex process that requires some video editing knowledge. The results may vary depending on the quality of the original VHS tape and the capabilities of the software. It's also worth mentioning that not all issues can be fully corrected in software, especially if the original tape is severely degraded or damaged.
By utilizing video restoration software, you can significantly enhance the viewing experience of digitized VHS videos, making them more enjoyable and closer to their original quality.
6) Restoration of VHS Tapes By Baking Method
Do not attempt to use kitchen ovens, microwave ovens, or other baking methods, as they have temperature fluctuations that can damage your tapes.
Many VCR owners have experienced clogged video decks caused by sticky tapes. When tapes are stored in a humid environment with humidity levels above 45%, the binder on the tape starts to release, resulting in sticky-shed syndrome. This causes tapes to stick to the VCR's transport path, leading to playback slowdowns, clogged video heads, and overall gumming up of the tape path.
The baking method can be used to address this issue by using a dehydrator to slowly remove the moisture from the tapes, restoring the tape binder and making them playable for a limited period.
Experts suggest that a temperature of around 125°F is ideal for baking the tapes. While the temperature control dial on a dehydrator is usually sufficient for baking videotapes, a digital thermometer with a flexible probe can be used for added accuracy.
If you're baking a reel-to-reel videotape, it's important to secure the loose end of the tape with plastic clips or a small piece of cardboard to prevent it from unspooling during the baking process. VHS and Beta tapes, on the other hand, can be safely baked while remaining in their cassettes, and disassembly is not required.
Once the dehydrator reaches the desired temperature and stabilizes, it typically stays within a range of 2-3°F of the target 125°F. It's worth noting that this temperature won't melt the plastic tape reel or videocassette housing.
Important safety precautions should be taken during the baking process. Do not leave the house while the dehydrator is running, and place the dehydrator on a non-flammable surface, such as the metal top of a clothes dryer. The underside of the dehydrator can reach temperatures of around 108°F during baking.
Allow the tapes to bake for approximately 8 hours, flipping them once or twice during the process. Avoid opening the dehydrator to check on the tapes frequently, as this can disrupt the temperature inside. After baking, let the tapes cool for a day before attempting to play them.
You will be amazed by the results! Tapes that previously stuck and left residue will now play like new, thanks to the restoration achieved through the baking method.

Abdo is a Zoopy writer who loves spending his free time outdoors, camping, and enjoying the peace that nature brings. He also enjoys fixing things - he's particularly good with electronics. His favorite movie is I Am Legend, and he's fascinated by survival gear and safety.