- Summary
- Safe and Easy Method: Online Professional Transfer Services
- Best DIY Methods to Convert VHS to Digital Format
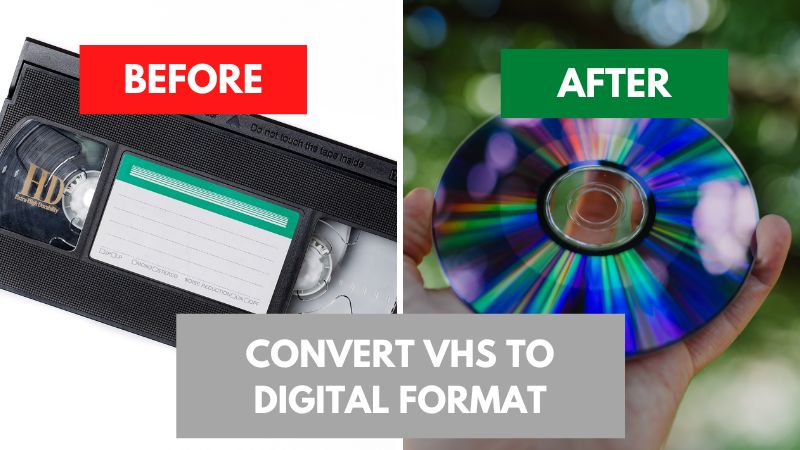
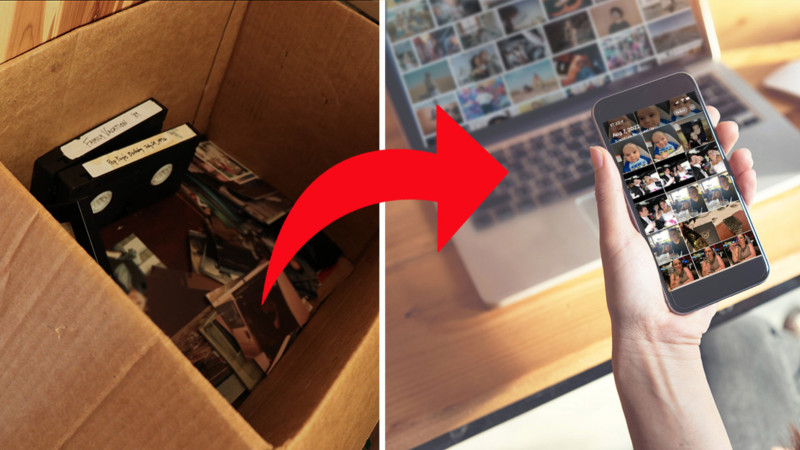
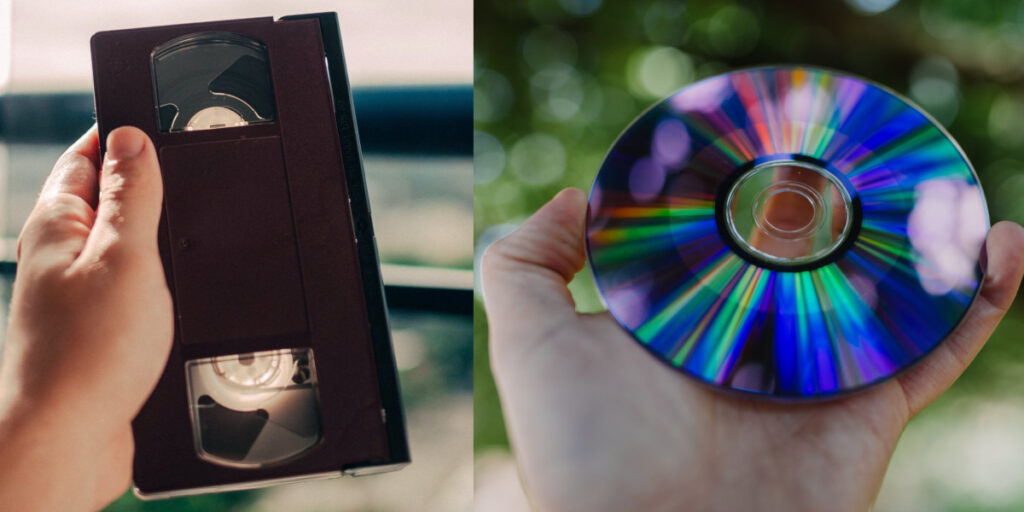
Preserving your cherished memories is important, and converting your old VHS tapes to digital format is a great way to do so. Many homeowners may have a collection of VHS tapes stored in less than ideal conditions, such as the basement, attic, or garage. Unfortunately, these spaces can hasten the deterioration of VHS tapes, leading to the potential loss of valuable footage.
To prevent this issue, we have put together a comprehensive guide that outlines two methods for converting VHS to digital format: professional and DIY.
While DIY methods can be cost-effective, they require technical knowledge, editing skills, time, and specialized equipment such as old players and camcorders, video capture devices, and software. Professional services, on the other hand, can save you from technical mistakes that could damage or destroy your tapes, and can also purchase any necessary equipment.
By following our guide and tips, you can ensure that your precious memories are preserved for years to come, and that you have the necessary tools to do so.
Summary
No matter which method you choose to convert VHS tapes to digital format, it's essential to remember that the quality of the original tapes determines the quality of the output files. If your VHS tapes are of low quality, your digital files will be of low quality as well. Some transfer services offer enhancements and repairs that can improve media quality, but don't expect miracles.
If you're not familiar with the process, it's best not to attempt transferring on your own. Mishandling the tapes can lead to permanent loss of footage. Instead, let the professionals handle the process and save your memories in the best possible way.
It's also wise to create backups of your digital files to avoid losing your precious memories in case of unexpected events such as computer crashes. You can upload your files to cloud storage, and some cloud providers offer free storage of up to 50GB, which is enough for most people.
Safe and Easy Method: Online Professional Transfer Services
Editor's pick
They provide their customers with a free quote, free image enhancements, professional splices of broken films and videotapes without losing footage, and free UPS shipping.
RUNNER UP
They take their digitizing process very seriously and each item is hand-digitized by a team of technicians.
If you're looking for a hassle-free and secure method to convert your VHS tapes to digital format, then using a professional online transfer service may be the right option for you. These services offer a safe and convenient way to transfer your VHS tapes to digital without any technical know-how or gear. Moreover, these services usually have over a decade of experience in converting VHS to digital and can also work with other tape formats and media types such as old films, photos, slides, and audio tapes.
Some of the Key Benefits of Converting Vhs Tapes with Professional Service
- Hassle-free and convenient transfer of VHS tapes to digital format
- Safe and secure handling of the original tapes to prevent damage or loss of footage during the transfer process
- High-quality transfer using professional equipment and the latest technology
- Capability to convert a variety of formats, including old video tapes such as Betamax, MiniDV, 8mm tapes etc.
- Your VHS tapes can be repaired and enhanced to look better (depending on the service you choose)
- Multiple digital formats options to choose from, such as DVD, USB, digital download, cloud storage, external hard drive etc.
- Reasonable pricing, usually around $15 per tape, with the option of discounts for bulk transfers (depending on service)
- Easy online ordering process, regular progress updates, and customer support available for any questions or concerns
- Fast turnaround time, such as 2-3 weeks (depending on service)
- All your original tapes are returned to you with the completion of the order.
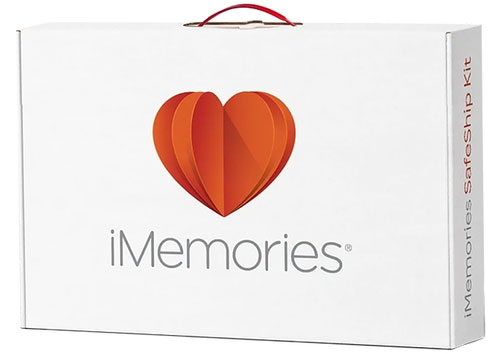
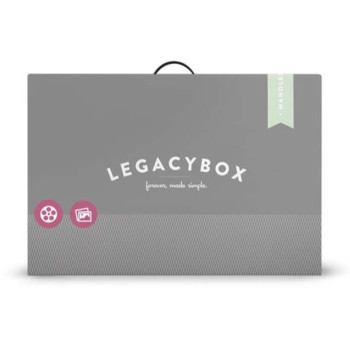
Comparison of Popular VHS Transfer Services
iMemories Editors Choice | Legacybox | ScanMyPhotos | Memory Fortress | |
 |  |  | ||
Website Link | ||||
Shipping kit (box) | Yes | Yes | Yes | No |
Free repairs (splicing) | Yes | Yes | No | No |
Average turnaround time | 2-3 weeks | 10-12 weeks | 4-8 weeks | 1-2 weeks |
Expedited turnaround time | n/a | 3-4 weeks | 2-4 weeks | n/a |
Reviews Across Multiple Websites | Trustpilot: 4.6 out of 5 Sitejabber: 4.7 out of 5 Yelp: 3.5 out of 5 | Trustpilot: 3.0 out of 5 Sitejabber: 3.6 out of 5 Yelp: n/a | Trustpilot: n/a Sitejabber: 2.3 out of 5 Yelp: 3.5 out of 5 | Trustpilot: n/a Sitejabber: n/a Yelp: 4.5 out of 5 |
WHAT FORMATS THEY CONVERT | ||||
Video Conversion | Betamax, VHS, VHS-C, 8mm, Hi8, Digital 8, MiniDV, MicroMini, DVDs, MiniDVDs | VHS, VHS-C, Mini-DV, Hi8, Digital 8, MicroMV, Betamax, 8mm Video Cassette | VHS, mini VHS, VHS-C, Hi8 NTSC format tapes | VHS, VHS-C, Betamax, Hi8, Digital 8, 8mm, MiniDV, MicroMV |
Film Conversion | 8mm, 16mm, Super 8 | 16mm, 8mm, Super 8, Regular 8 | 8mm, 16mm, Super8 | 8mm |
Photo Conversion | Photos, Negatives, Slides | Prints, 35mm Negatives, 35mm/126 slides | Photos, slides, negatives | Photos, negatives, slides |
Audio Conversion | N/A | Reel to Reel, Audio Cassette, Micro-Cassette | N/A | N/A |
PRICING | ||||
Video Conversion Price | $14.99 per tape | $59.99 for 2 tapes $279.99 for 10 tapes $559.99 for 20 tapes $1099.99 for 40 tapes | $19.95 per tape | Starts at $20 per tape but gets cheaper the more you add |
Film Conversion Price | $14.99 per 50ft. | $59.99 for 2 films $279.99 for 10 films $559.99 for 20 films $1099.99 for 40 films | Starting at 19¢ per foot for 8mm, and 25¢ for 16mm | $0.29 per foot |
Photo Conversion Price | $0.49 per photo | $59.99 for 2 sets of 25 pictures $279.99 for 10 sets of 25 pictures $559.99 for 20 sets of 25 pictures $1099.99 for 40 sets of 25 pictures | Starting at 13¢ per scan ($25 minimum) | Starts at $0.38 per photo but gets cheaper the more you add |
Audio Conversion Price | N/A | $59.99 for 2 audio items $279.99 for 10 audio items $559.99 for 20 audio items $1099.99 for 40 audio items | N/A | N/A |
How Online Professional Service Convert VHS to Digital
Online professional services offer a convenient and straightforward way to convert VHS tapes to digital format. Our table includes the most popular choices, which are easy to use and have a straightforward process. To get started, visit the service website of your choice and place an order. Depending on the service you choose, you may get a shipping kit, send VHS tapes in your box, or have both options.
If you choose to mail tapes in your own box, make sure it's sturdy or, even better, crush-proof. We recommend using a shipping kit if your service offers one.
If you choose a service that offers a shipping kit or conversion box kit, you'll receive all the necessary protective packaging, a user guide, and a prepaid shipping label. Make sure to follow the provided user guide and pack the tapes correctly. Then attach the prepaid shipping label to the box and drop it off at the nearest postal drop-off.
If you're sending tapes in your box, services recommend using a postal carrier that provides a tracking code.
Once your tapes arrive, the service will notify you. Your tapes will be checked and sent to the conversion process. Most services have a tracking system for each item during the process, and they'll notify you of each step your media goes through. Some services go a step further and provide online viewing and editing of the converted media in real-time.
Digital Option That VHS Tapes Will Be Converted To
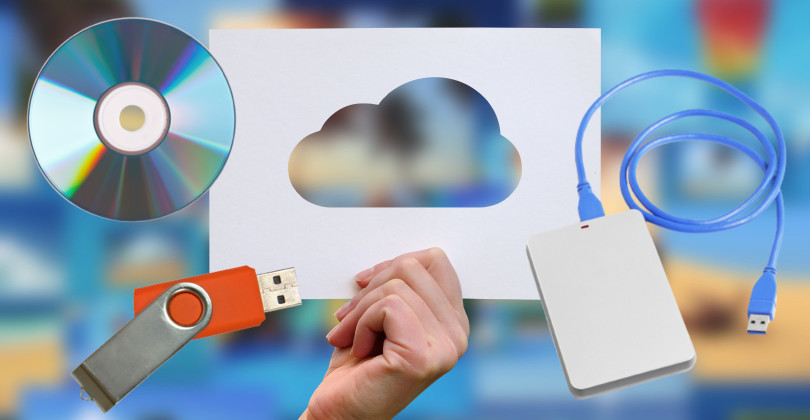
When placing your order, you'll have the option to choose the preferred digital format to which your VHS tapes will be converted. Depending on the service you select, your tapes can be converted to DVD, USB, external hard drive, cloud, or be downloaded in digital form.
Repairs and Enhancements for Your Converted VHS Tapes
As we mentioned earlier, online professional digitization services typically offer repairs and enhancements for media. Depending on the service you choose, repairs may include replacing tape housing and professional repair or splicing of videotape film without losing any footage. As for enhancements, after your tapes are converted, they may undergo digital editing to improve footage quality and make it look better than the original. Repairs and enhancements are just a few of the many features that can be applied for a free or added price.
Service Turnaround Time
If you're wondering how long the entire process of converting VHS to digital format takes, it ultimately depends on the service you choose, the amount of media you plan to send, and the media type. Generally, the average turnaround time is 2-3 weeks, but some services may take as long as 10-12 weeks. If you're in a hurry, it's essential to consider the turnaround time when choosing a service.
Return Of Your Original VHS Tapes
Many people wonder if a VHS transfer service will send their original tapes back to them after completing the order. We can assure you that most services will return your original media. However, it’s essential to note that some services may charge overpriced shipping fees or disposal fees if you choose not to have your original tapes returned. Therefore, before making your final decision, make sure to check the service’s policies regarding the return of original tapes.
While there may be exceptions, most online VHS transfer services prioritize the safe and secure return of your original tapes.
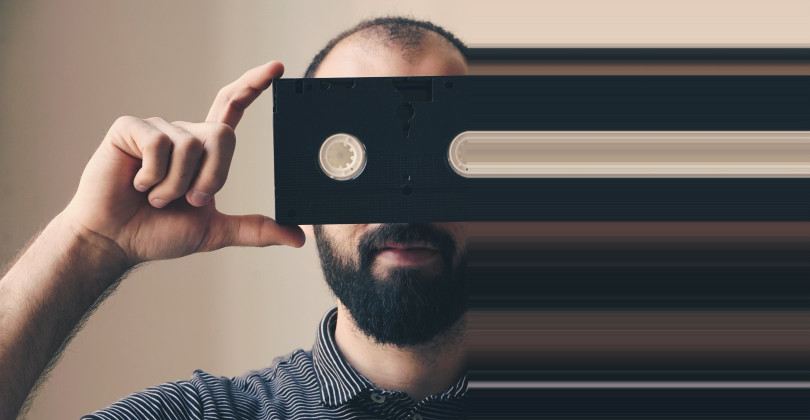
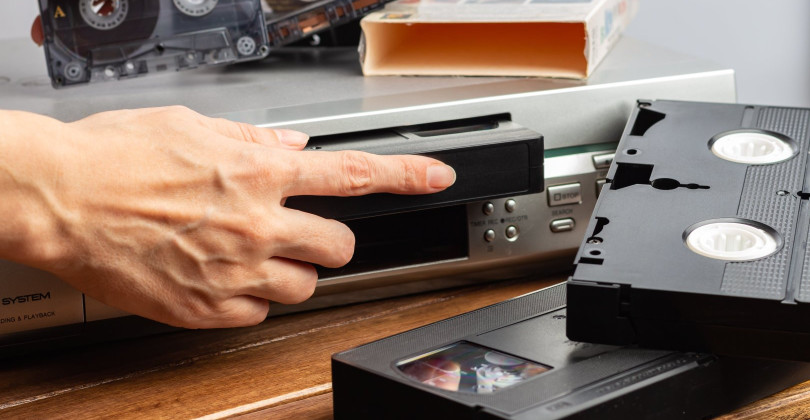
Best DIY Methods to Convert VHS to Digital Format
You can convert VHS tapes yourself if you have the right equipment in good working order. Here are some of the methods of converting VHS to digital with the help of VHS to digital converter.
- Camcorder
- Firewire Card for capturing video on a computer
- VCR DVD combo
- VHS player deck
Converting VHS by yourself comes with the potential risks of damaging or even destroying footage on VHS tape. If you decide to do so, make sure that you have tested the functionality of the needed equipment before putting your memories in the device. You are fully responsible for the final outcome!
DIY converting tapes to digital sounds easy, but it usually goes the other direction. Connecting different types of old devices gives you problems that are hard to figure out and take a ton of time before you even start.
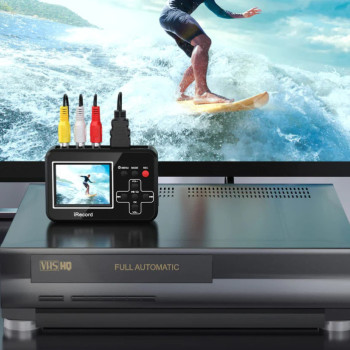
VHS to Digital Converter Kit
Editor's pick
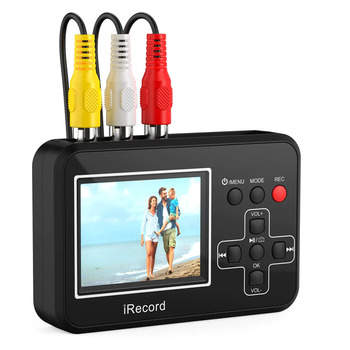
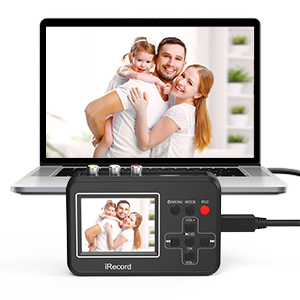
DIGITNOW VHS to Digital Converter
Convert your VHS tapes to digital files effortlessly with DIGITNOW video converter box. Share, watch, and edit your family memories anytime, anywhere.
RUNNER UP
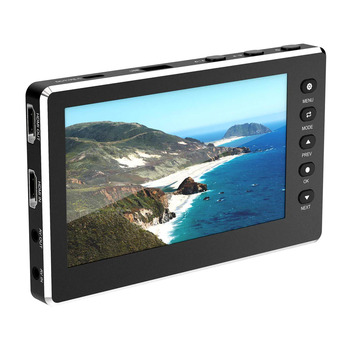
DIGITNOW HD Video Capture Box 1080p
This DIGITNOW converter features AV and HDMI input/output and supports HD 1080P video signal. Preview audio and video with built-in stereo speakers and 5" OLED screen.
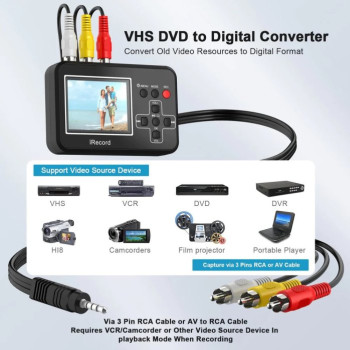
You probably came across these VHS conversion devices. They are easy to use and have decent-quality output. Also, they come with all the necessary connections, cables and memory cards for storing captured footage.
Unfortunately, these video-capturing devices have problems with drives, especially cheap models that come with RCA to USB connection.
But luckily, there is an easy way around it. Also, the cheaper converter you get, the more problems you will have, so if you plan to buy this kind of device, invest in a good one.
We are gonna mention some of them that don't require any drivers to operate, so be sure to check them up.
Here are the steps for using the digital converter approach:
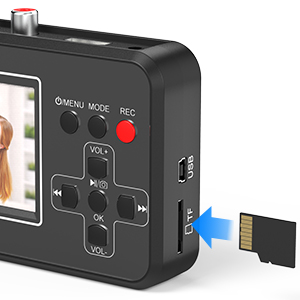
- Insert the memory card into the VHS capture device, connect it to the charger, and power it on.
- On VCR, find the RCA port and plug the provided RCA cable end into it, and the other end of the cable connects to the capture device.
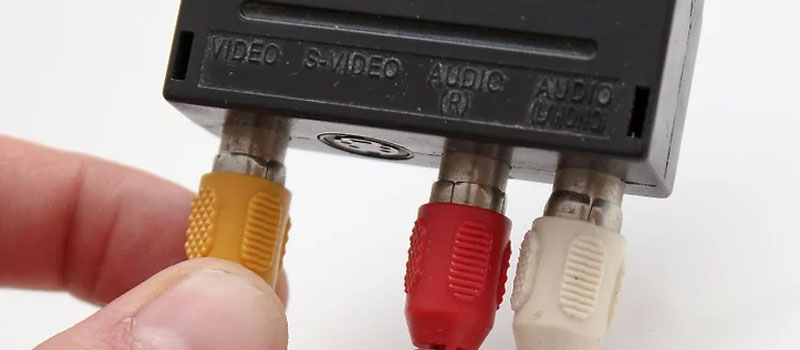
- Inside the device settings, find the video source and set it on RCA (double-check the setting is applied). If everything is set properly, you should be able to see the camera’s live view on your capturing device.
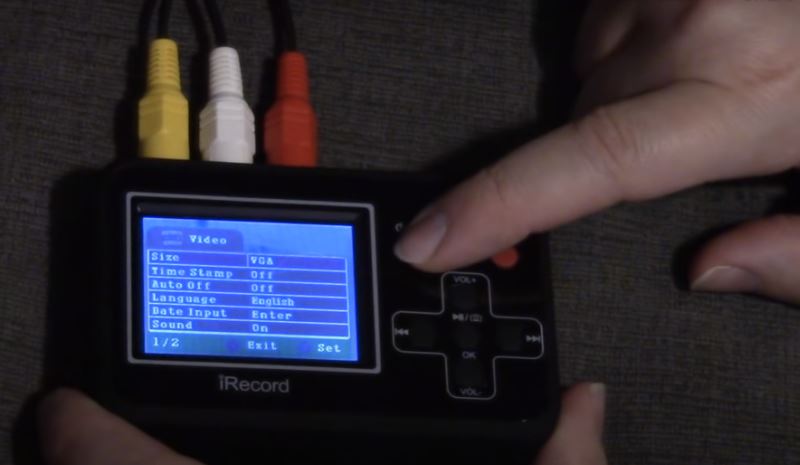
- Insert VHS tape into VCR and play the footage you want to convert and immediately after that, press the “record or rec” on the capture device software to start capturing the footage.
- After the played footage ends, press stop on the VHS converter.
- Check if the footage is successfully captured on the converter, and then you can transfer it to other devices for editing or sharing.
Advantages and Disadvantages of Using a Video Converter/capturing Device to Digitize Vhs Videotapes
Advantages:
- High-quality capture and conversion due to direct digital transfer.
- Easy to use with real-time footage capturing.
- Captured footage is stored on USB/SD card, ready for viewing and sharing.
- View captured footage on TV or device.
Disadvantages:
- Need to purchase a converter device if you don’t own one.
- Compatibility issues with specific devices and operating systems.
- The transfer process can be time-consuming and complex due to real-time capture.

Abdo is a Zoopy writer who loves spending his free time outdoors, camping, and enjoying the peace that nature brings. He also enjoys fixing things - he's particularly good with electronics. His favorite movie is I Am Legend, and he's fascinated by survival gear and safety.
Why isn't there a self-contained unit that can be hooked up directly to a PC? I no longer have a working VHS player hooked up. I don't need the input half of a VHS player, only the output, since I'm dealing with already recorded media. I'm picturing a unit the size of a VHS tape rewinder. You would put the tape in and hook it to a USB or HDMI slot on your PC and hit the play button. The Tape would play on your PC monitor, and a program like NERO would capture it. Then I could use my PC's DVD burner or a thumb drive for making a copy. I want to eliminate the need for a VHS player. Services like legacy box from the reviews I've read can take up to 6 months to complete the job. I don't want that lengthy turnaround time. They also can refuse to copy a commercial tape.