- Our top pick
- Professional Digitizing Service
- Digital Service Comparison Table
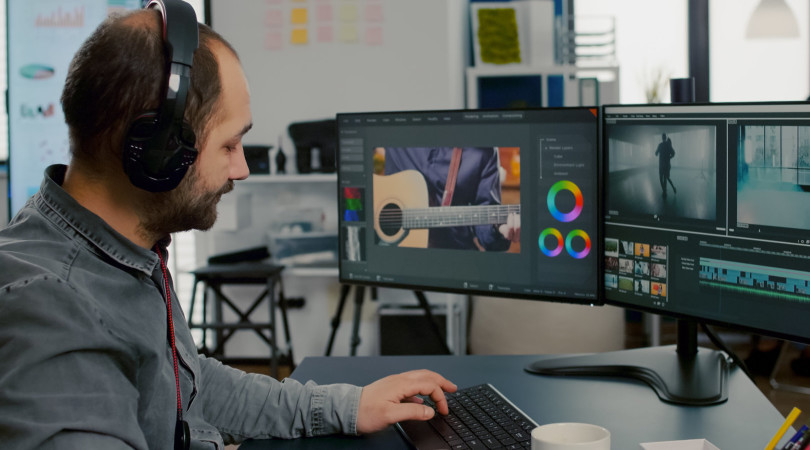
- Converting Through Camcorder and Computer
- Converting Via Video Capture Card
- Converting With Video Capturing Box
- Converting With Camcorder and DVD Recorder
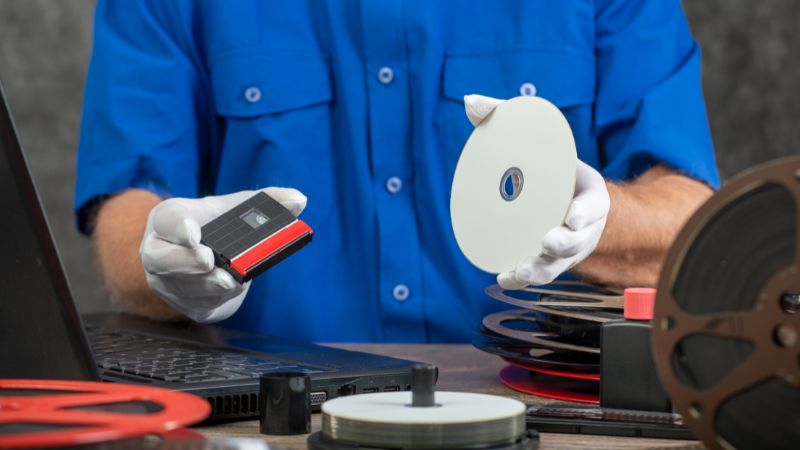
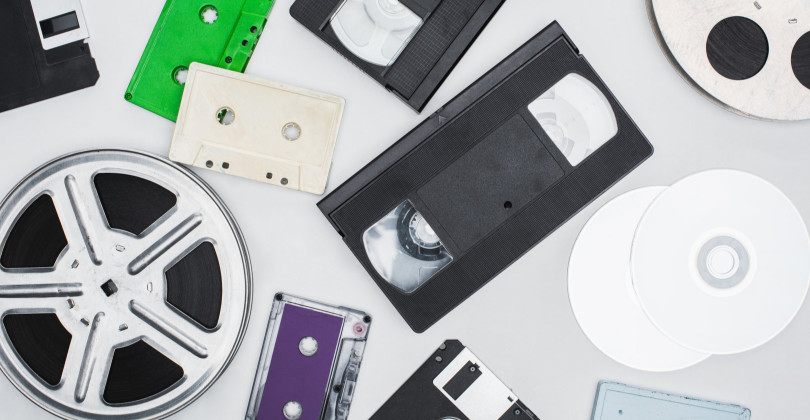
For those who ventured into home filmmaking during the vibrant 80s, the names Video8, Hi8, and Digital8 tapes surely ring a nostalgic bell. These formats gained popularity for their user-friendly design, tailored to the everyday consumer. Crafted for lightweight camcorders accessible to the masses, these tapes enabled households to capture their treasured moments. However, as time flowed on, their charm waned, fading from the limelight. Yet, remnants remain—stacks of these antiquated cartridges occupy valuable space, competing with modern necessities.
Editor's pick
They accept all 8mm tapes (Video8, Hi8, Digital8). Additionally, they provide their customers with a free quote, including enhancements, professional splices of broken films and videotapes without losing footage, and free UPS shipping.
The vulnerability of videotapes to the passage of time is undeniable. A stark reality emerges: the Hi8 format, for instance, could forfeit up to 20% of its data within a mere decade. Thus, contemplating the conversion of Hi8 reels becomes a race against an unforgiving clock—a choice best made sooner rather than later.
In response to the fervent curiosity surrounding the transformation of 8mm tapes into digital treasures, we've meticulously crafted this guide. Within its embrace, you'll discover an array of approaches suited for every seeker. Whether a novice or a connoisseur, this guide aims to illuminate your path towards immortalizing those cherished memories.
Converting 8mm Tapes via Professional Digitizing Service
8mm tapes conversion through a professional digitizing service offers a practical and safe alternative to the do-it-yourself methods. If uncertainty shrouds your individual capacity or the requisite equipment is absent, entrusting your tapes to a proficient digitizing company emerges as the wisest course of action.
In contemporary times, a multitude of companies extend their services at reasonable rates, often augmenting their offerings with enhancements that breathe new life into your cherished memories.
Best 8mm Tapes to Digital Service Comparison Table
iMemories Editors Choice | Legacybox | Forever Studios | Nostalgic Media | DigMyPics MemoryBox | |
 |  |  |  |  | |
Website Link | |||||
Shipping kit (box) | Yes | Yes | Yes | No | Yes |
Free repairs (splicing) | Yes | Yes | No | Yes but not for free | Yes |
Enhancements | Included | No | Additional $5 per tape | n/a | Included |
They return the originals | Yes | Yes | Yes | Yes | Yes |
Average turnaround time | 2-3 weeks | 10-12 weeks | 2-3 weeks | 5-7 days | 2-4 weeks |
Expedited turnaround time | Expedited processing available for an additional fee. | 3-4 weeks and 10 business days for additional fees | Optional rush service available for additional fee | n/a | n/a |
Reviews Across Multiple Websites | Trustpilot: 4.5 out of 5 Sitejabber: 4.7 out of 5 Yelp: 3.5 out of 5 | Trustpilot: 3.0 out of 5 Sitejabber: 3.6 out of 5 Yelp: n/a | Trustpilot: 4.0 out of 5 Sitejabber: n/a Yelp: 4.5 out of 5 | Trustpilot: n/a Sitejabber: 5 out of 5 Yelp: n/a Facebook: 5 out of 5 Google: 4.9 out of 5 | Trustpilot: n/a Sitejabber: 5 out of 5 Yelp: n/a Facebook: 4.1 out of 5 |
WHAT FORMATS THEY CONVERT | |||||
Video Conversion | 8mm, Hi8, Digital 8, MiniDV, Betamax, VHS, VHS-C, MicroMini, DVDs, MiniDVDs | VHS, VHS-C, Mini-DV, Hi8, Digital 8, MicroMV, Betamax, 8mm Video Cassette | VHS, VHS-C, Hi-8, Mini Dv, Beta, Umatic, DVC Pro, DV CAM | VHS, VHS-C, S-VHS, Hi-8, Video8, Digital 8, and MiniDV | VHS, VHS-C, Hi8, Video 8, Digital 8, MiniDV, Betamax |
Film Conversion | 8mm, 16mm, Super 8 | 16mm, 8mm, Super 8, Regular 8 | Super 8, 8mm, and 16mm | Super 8, 8mm, and 16mm | 8mm, Super 8, 16mm |
Photo Conversion | Photos up to 12X16 | Prints, 35mm Negatives, 35mm/126 slides | Photo prints, Photos in albums, 35mm slides, and 35mm negatives | Photo prints, Prints in albums, 35mm slides, and Negatives | Prints, negatives, slides |
Audio Conversion | N/A | Reel to Reel, Audio Cassette, Micro-Cassette | Reel to Reel, Audio Cassette, Micro-Cassette | Audio cassette, micro cassette, 33 record albums, 78 record albums, 45 record albums, and audio reels | Cassette tape, reel to reel tape |
PRICING | |||||
Video Conversion Price | $14.99 per tape | 2 tapes: $59.99 | Standard Formats: $11 per tape ($16 with enhanced quality) | Starting at $30 per tape | $65 - $600 |
Film Conversion Price | $14.99 per 50ft. | 2 films: $59.99 | 3” reels: $11/50ft. | Starting at $0.22 per foot | $65 - $600 |
Photo Conversion Price | $0.49 per photo | $59.99: 2 sets of 25 pictures | $0.35/photo, slide, negative, or $0.45 for enhanced quality | $0.19 per 3x3 to 4x6 (300dpi)
| $65 - $600 |
Audio Conversion Price | N/A | 2 audio items: $59.99 | Audio Cassettes & Microcassettes: $17 | $45 per media | $65 - $600 |
Here's a brief guide to comprehending the core steps of engaging a professional service:
Ordering Process
When it comes to placing an order, the process is straightforward, comprising a series of clearly outlined steps. Should queries arise, their customer support is readily available via phone or email. Drawing from our experience, emails generally solicit a response within a couple of hours, the timing contingent on the specific company's responsiveness.
Media Type
This step hinges on both the service selected and the media earmarked for digitization. Hi8, Video8, and Digital8 tapes pose no impediment, given their near-universal acceptance by most services. If you contemplate sending alternative media, a preliminary examination of the service's compatibility is advisable.
Mailing Your Media
Common concerns regarding the mailing of irreplaceable media are valid. The prospect of loss or damage to cherished memories looms large. Choices abound when dispatching media to a service:
- Hand-delivering to the company's facility
- Mailing by postal carrier of your preference while using your packaging
- Utilizing a crush-proof box supplied by the service (availability varies)
- Opting for scheduled home pickup
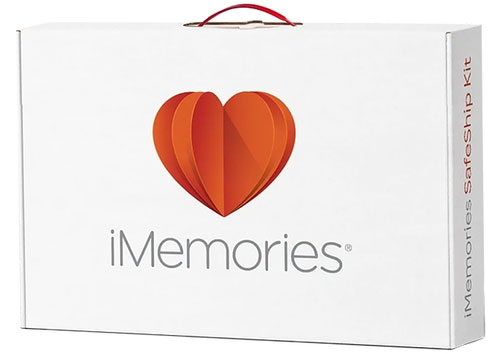
For instance, iMemories proffers its own SafeShip Kit—a fortified container equipped with protective bags for secure media packaging, shock-absorbent cushions, and a prepaid FedEx shipping label.
When shipping media in your own container, we recommend selecting a carrier with robust tracking capabilities. Also, bear in mind that full responsibility for the safety of packaging and shipping rests with you.
Notifications

Expect notifications upon the arrival of your media at the facility, as well as upon the completion of the digitization process by skilled technicians. Inquisitive services might contact you for clarifications. Certain providers, like iMemories, take an extra stride, furnishing real-time updates via regular emails and an Order Status page, meticulously detailing every step of the media's journey through digitization.
Digitizing Process
Upon arrival at the facility, your media undergoes meticulous scrutiny, being labeled for streamlined tracking before embarking on the digitization journey. Accomplished hands and cutting-edge equipment guide the process. Possibilities during this phase encompass:
- Physical or digital repairs
- Enhancement for optimal quality
- Adjustments to colors
The availability of specific features is contingent upon the service and may vary according to media type.
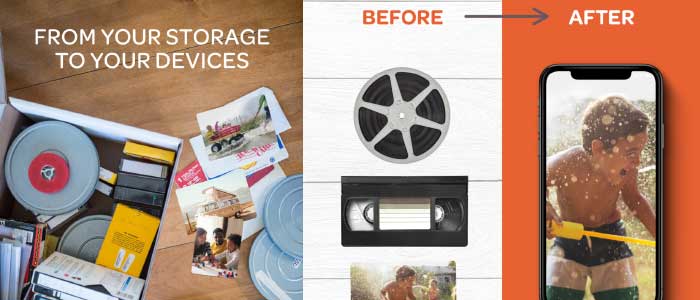
Digital Storage
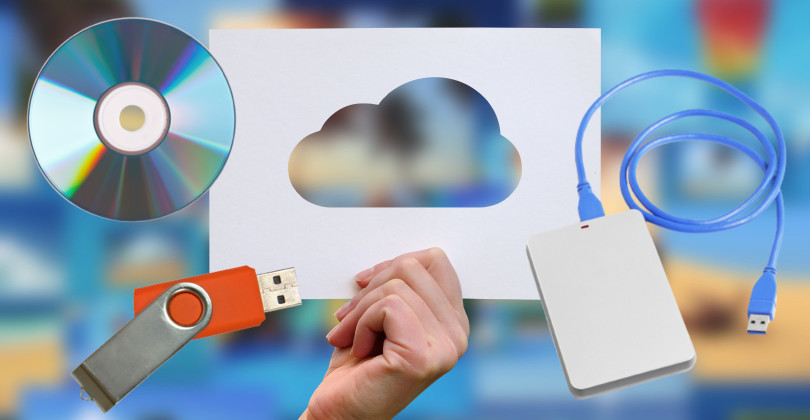
Tailoring your selection to the service's offerings, you can obtain the digitized media in various formats:
- Digital download
- Cloud storage
- DVD
- Blu-ray
- USB
- External hard drive.
While digital downloads and USB options are frequently recommended, for extensive collections, an external hard drive proves optimal.
Turnaround Time

The time frame for completion fluctuates, spanning from 1 to 12 weeks. This variance hinges on the chosen service, media quantity and type, as well as whether certain services partner with retail entities. Note that outlets such as CVS and Walmart, while offering digitization services, often relay the actual task to professional digitizing services, potentially elongating the process.
Price
Pricing structures span diverse ranges and methodologies. For instance, charges may oscillate between $14.99 to $30 per tape, coupled with an additional fee for your chosen digital copy format. Some services might levy charges based on tape footage length, potentially escalating costs. iMemories, for instance, proffers an equitable $14.99 per tape for transfer, along with a gratis option to download digitized content.
Converting Through Camcorder and Computer
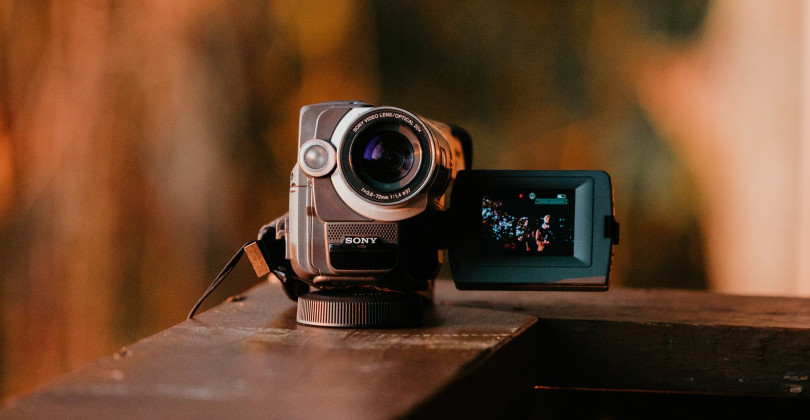
To begin, ensure the operational integrity of your camcorder before engaging in any of the methods delineated. It is prudent to safeguard your significant tapes from potential harm by initially assessing your camcorder's functionality. Employ a test tape to verify the proper working condition of the camcorder.
For this method, your computer necessitates at least one unoccupied USB-A port and the requisite software to capture the playback from your camcorder. Throughout our exploration, we identified a suitable cost-free software solution, VirtualDub.
Here's a comprehensive guide on how to proceed using your camcorder and computer:
- Locate Connection Ports: Discern the location of the connection ports on your camcorder. Typically, these are concealed beneath a protective cover.
- Cable Connection: Utilizing the appropriate cable, establish a connection between your camcorder and the computer.
- Camcorder Setup: Configure your camcorder to VCR mode, aligning it for the impending conversion process.
- Tape Insertion: Insert the MiniDV tape into your camcorder, positioning it for playback.
- Software Activation: Launch the video-capturing software of your preference on your computer.
- Initiate Capture: Within the menu of the capture software, locate and select the "capture" option. Await the emergence of a capture window on your computer monitor.
- Camcorder Playback: On your camcorder, press the "Play" button to initiate the playback of the tape.
- Capture in Progress: As the tape plays, the video content should manifest within the capture window of your software, encapsulating the visual essence.
- Termination of Capture: Once the tape concludes its playback, cease recording within the software interface.
Converting 8mm Tapes to Digital Via Video Capture Card

Exploring the avenue of transferring your cherished 8mm tapes into the digital realm through a Video Capture Card offers two distinct options: the video capture card that integrates into your PC motherboard and the external USB video capture card.
Before embarking on this path, it's essential to gather a computer and a video capture card. When using the video capture card that connects directly to the computer motherboard, it functions as the conduit for converting the analog video from your 8mm tape into a digital format, securely stored on your computer's hard drive.
Opting for the external USB video capture card simplifies the process, as it seamlessly integrates with any computer boasting a USB port.
For those selecting the USB capture card route, the following steps will guide you:
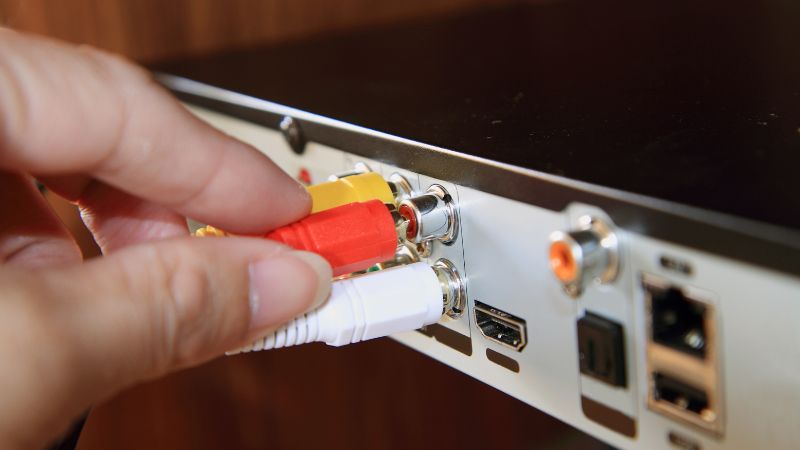
- Connect Cables: Plug the RCA cable extending from the capture card into the RCA output port of your camcorder. This interconnection serves as the bridge between the analog signals of your 8mm tape and the digital realm.
- USB Integration: Insert the capture card into a USB port on your computer. If the capture card requires driver installation, ensure you promptly install the required software.
- Camcorder Setup: Activate the Playback, VCR, or VTR mode on your camcorder. This selection primes the camcorder for playing back the tape's contents.
- Position Tape: Before initiating the transfer, ensure that your tape is poised at the outset of the desired footage.
- Software Initiation: Open the program designated for video recording or editing. This software will serve as the platform for capturing and refining your digitized content.
Worth noting is the inclusion of software with certain external video capture devices, facilitating streamlined use. Depending on the specific device, functionalities such as segment removal, title inclusion, chapter designation, background music infusion, and more might be available.
In navigating the captivating realm of digitization, the Video Capture Card stands as an accessible and effective means to translate your analog treasures into vibrant digital entities.
Converting With Video Capturing Box/Converter
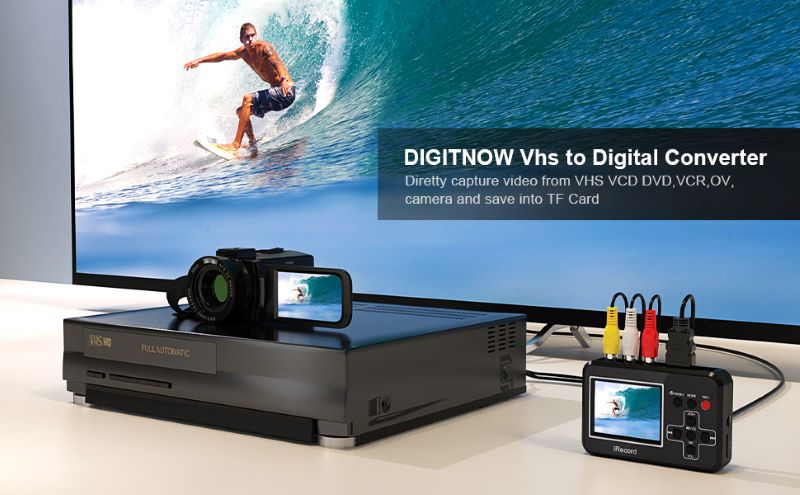
The pursuit of transforming vintage tapes into digital wonders frequently leads to the realm of video converters and capturing devices. Although video converters can sometimes wrestle with driver issues, especially the RCA to USB models, a workaround exists for these challenges. The silver lining is that there's a straightforward solution within reach. Moreover, it's important to bear in mind that investing in a quality device is paramount; a lower-cost converter might present more complications.
DigitNow HD Video Capture Box | DigitNow VHS to Digital Converter | DigitNow VHS to Digital Converter Box | DigitNow USB 2.0 Video Capture | |
Editors Choice  | 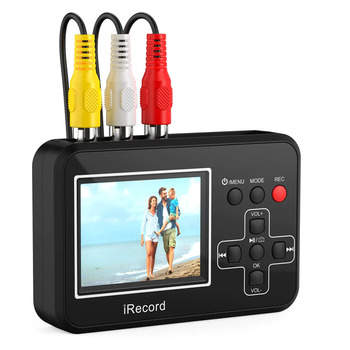 |  |  | |
Website Link | ||||
Price | $169.99 | $84.99 | $ 179.99 | $49.99 |
Description | The DigitNow HD Video Capture Box is a versatile converter that supports AV and HDMI HD 1080P video input and output. It features 3.5mm video input and output ports and comes with built-in speakers for audio and video preview. You can save your converted videos on a USB flash drive or SD card (up to 128GB) formatted as FAT32 or exFAT. This converter allows you to capture HD 1080P video from various sources, including VCRs, VHS tapes, Hi8, camcorders, DVDs, TV boxes etc. It also includes a convenient 5" OLED screen for easy video playback. | The DigitNow VHS to Digital Converter offers a user-friendly one-touch operation for converting your videos to digital files. With this converter, you can easily restore and share your family memories from the past. It allows you to share your digitized videos on your PC, smartphone, or TV. | The DigitNow VHS to Digital Converter provides HD 1080P video capture and recording from various sources, including VCRs. It features a 5" OLED screen for convenient video preview and playback. | The DigitNow USB 2.0 Video Capture is an all-in-one pro version designed for converting old VHS tapes into digital files. It supports video output formats such as MJPEG-19201080@30Hz and YUV422-720576@25Hz. The converter comes with powerful editing software for easy editing and burning of DVD formats. |
Gearing up for this endeavor requires assembling the following tools:
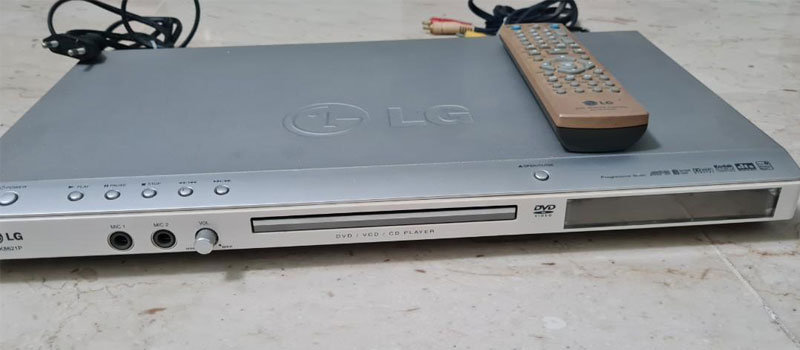
- Camcorder that supports the cassette you want to convert
- An AV to RCA cable. If the AV to RCA is female, an additional RCA cable with male connectors on both ends becomes essential (it's wise to check if these cables are included with the device).
- Video converter box
- Depending on the specific converter, a mini/micro USB cable for Micro SD card might be necessary for transferring footage to a PC or laptop.
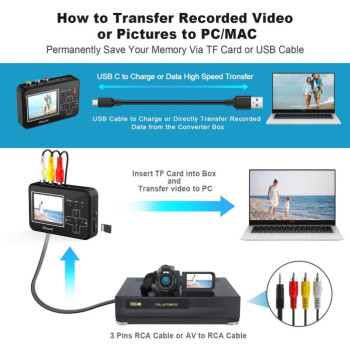
The process unfolds as follows:
- Place the memory card into the video capture device.
- Connect the device to its charger and power it on.
- Locate the AV port on the camcorder. Insert one end of the AV cable into this port and the other end into the capture device.
- Access the device settings and navigate to the video source option. Set it to "AV" (verify that the setting takes effect). If your connection uses an S-Video cable instead of AV to RCA, opt for "S-Video" in the source menu. Successful configuration should unveil your camcorder's live view on the capturing device.
- Find the specific footage you intend to convert on the camcorder. Press the "play" button on the camcorder and immediately thereafter, initiate recording by hitting the "record" or "rec" button within the capture device's software. If your camcorder's screen displays any information or menus during playback, disable this feature in the camcorder's settings. This ensures that only the desired footage is captured.
- When the played footage concludes, halt playback on both the camcorder and the capturing device.
- Verify the successful capture of the footage on the device. Subsequently, you can transfer it to other devices for editing or sharing.
If your camcorder and capturing device support an S-Video connection, it's advisable to utilize this option instead of AV due to the superior picture quality it offers.
Navigating the terrain of video converters and capturing devices empowers you to embark on a journey of transformation, as you breathe digital life into your cherished analog memories.
Converting Using Camcorder and DVD Recorder
Transforming your 8mm tapes into digital brilliance through a camcorder and DVD recorder is perhaps the most straightforward avenue. This method grants you the ability to craft digital renditions onto DVDs without the necessity for intricate software.
To embark on this journey, you'll require the following gear:
- A functional Camcorder
- DV cable (4-pin to 6-pin). Ensure compatibility between the ports on both devices.
- DVD recorder
- Blank DVD
Prior to commencing, it's prudent to ascertain the operational status of the DVD recorder to avoid any hiccups during the process.
The following steps will guide you through the process:
- Cable Connection: Using a DV cable that matches the compatible type, establish a connection between the camcorder and the DVD recorder's input port (typically, DVD recorders sport labeled ports to simplify the process).
- Insert Blank DVD: Place a blank DVD into the DVD recorder and await its full loading.
- Tape Insertion: Introduce the Mini DV tape you wish to convert into the camcorder. Subsequently, opt for the input type aligned with your connection method.
- Initiate Playback and Recording: Press the "play" button on the camcorder, followed by hitting "record" on the DVD recorder.
- Conversion in Progress: As the camcorder plays the footage, the DVD recorder simultaneously captures and transfers it onto the blank DVD you've inserted.
- Completion: With the conclusion of the footage, halt playback on both the camcorder and the DVD recorder.
By following these steps, you are able to elegantly transpose your analog treasures into the digital realm, preserving them for posterity on a DVD medium.

Abdo is a Zoopy writer who loves spending his free time outdoors, camping, and enjoying the peace that nature brings. He also enjoys fixing things - he's particularly good with electronics. His favorite movie is I Am Legend, and he's fascinated by survival gear and safety.