- Summary
- Scanning With Professional Service
- Best Negative Scanning Service Table
- Dedicated Negative Film Scanners
- Best Negative Scanners Table
- Scanning Negatives With Flatbed Scanner
- Scanning With DSLR/Mirrorless Camera
If you're interested in digitizing your film negatives, various methods are available. By exploring the details of each option, you can make an informed decision that suits your needs effortlessly.
This guide will outline the process of scanning and converting photo negatives into digital images, offering insights into professional services, film scanners or converters, flatbed scanners, and utilizing a digital camera as a scanner. By examining the advantages and disadvantages of each approach, you'll gain a clear understanding of which service to opt for.
Let's delve into the different methods and explore their unique benefits and drawbacks.
Summary
Digitizing film negatives can be achieved through several methods, each with its own pros and cons.
Professional Scanning Services: This option provides a hassle-free, high-quality solution. Experts handle your negatives, offering optimized scans for color balance, contrast, and sharpness. The process is convenient but can be time-consuming and initially costly, although affordable options exist.
iMemories Service

Dedicated Negative Film Scanners: Ideal for DIY enthusiasts, these scanners offer superior results compared to traditional scanners. They come with proprietary software for image correction and various types of film and slide holders. The user-friendly interfaces are a plus, but the software's quality can vary.
Flatbed Scanners: Another DIY option, flatbed scanners offer convenience and accessibility. The image quality depends on the scanner's quality. The process is beginner-friendly, but image correction requires photo editing software, which may not be user-friendly for everyone.
DSLR/Mirrorless Camera Scanning: This method offers excellent output quality and control. It requires specific equipment and involves setting up the equipment, positioning the film, adjusting the camera settings, capturing the image, and post-processing. The process can be time-consuming but offers flexibility and control.
Scanning Negatives With Professional Service
If you're seeking the easiest method with the highest quality results, opting for a professional scanning service is highly recommended. By choosing this route, you'll benefit from the expertise of scanning professionals who possess in-depth knowledge of different film types and scanning techniques, ensuring your negatives are handled and scanned with utmost care.
One of the significant advantages of professional services is their ability to optimize scans for color balance, contrast, and sharpness. Their expertise allows them to enhance the overall quality of your digital images, saving you the trouble of learning complex editing software or investing in expensive scanning equipment.
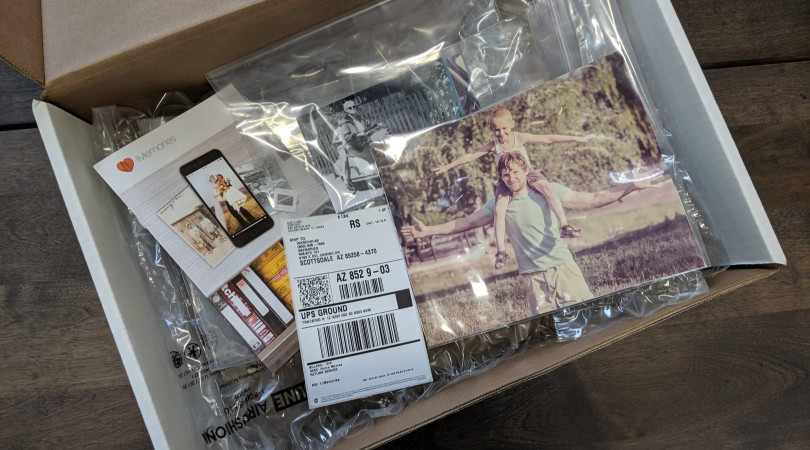
Convenience is another key aspect of professional services. You can easily send your negatives to the service by utilizing their conversion box kit or by using your own secure packaging. Additionally, reputable services often include complimentary digital enhancements as part of their process, further enhancing the final appearance of your scanned images.
Upon completion of the conversion process, you have multiple options for receiving your digital photos. You can choose to have them transferred to a USB drive, DVD, cloud storage, or simply download them directly.
While some may perceive professional services as expensive initially, it's worth noting that many services offer affordable pricing options.
Prices can start as low as $0.47 per image on the negative strip, making it a cost-effective choice for preserving your memories.
One potential downside to consider is the duration of the process. Depending on the service and workload, the turnaround time can range from 1-2 weeks or even longer. However, the wait is often worthwhile due to the expertise and quality of the final results.
Best Negative Scanning Service Comparison Table
Service | Editors Choice iMemories  | ScanMyPhotos  | Legacybox  | Time Capsule  | DigMyPics MemoryBox  | Costco Digitizing  |
Website Link | ||||||
Shipping kit (box) | Yes | Yes | Yes | Yes | Yes | Yes |
Free repairs (splicing) | Yes | No | Yes | Yes | Yes | Yes |
Enhancements | Yes | Yes | No | Yes | Yes | Yes |
Average turnaround time | 2-3 weeks | 4-8 weeks | 10-12 weeks | 30 days | 2-4 weeks | 3-4 weeks |
Expedited turnaround time | n/a | 2-4 weeks | 3-4 weeks | n/a | n/a | 10 days |
ONLINE REVIEWS | ||||||
4.6 | n/a | 4.0 | n/a | n/a | 4.7 | |
4.7 | 2.3 | 3.5 | n/a | 5.0 | 2.5 | |
4.0 | 3.5 | n/a | n/a | n/a | 3.5 | |
4.4 | n/a | n/a | n/a | 4.1 | n/a | |
WHAT FORMATS THEY CONVERT | ||||||
Video tapes | Betamax, VHS, VHS-C, 8mm, Hi8, Digital 8, MiniDV, MicroMini, DVDs, MiniDVDs | VHS, mini VHS, VHS-C, Hi8 NTSC format tapes | VHS, VHS-C, Mini-DV, Hi8, Digital 8, MicroMV, Betamax, 8mm Video Cassette | VHS, S-VHS, VHS-C and S-VHS-C, Betamax, Video-8, Hi-8, Digital-8, Mini-DV, DVCAM, DV, DVC | VHS, VHS-C, Hi8, Video 8, Digital 8, MiniDV, Betamax | BetaMax, Hi8, Digital8, Mini DV, VHS-C, S-VHS |
Film | 8mm, 16mm, Super 8 | 8mm, 16mm, Super8 | 16mm, 8mm, Super 8, Regular 8 | 8 mm, Super 8 mm, 16 mm | 8mm, Super 8, 16mm | 8mm film, Super 8 film, 16mm film, 35mm movie film |
Photos | Photos, Negatives, Slides | Photos, slides, negatives | Prints, 35mm Negatives, 35mm/126 slides | Photos:
| Prints, negatives, slides | Up to 8"x10" 35mm color slide APS, Black & White |
Audio | N/A | N/A | Reel to Reel, Audio Cassette, Micro-Cassette | n/a | Cassette tape, reel to reel tape | Reel-to-Reel, Cassette tape |
PRICING | ||||||
Video Conversion Price | $14.99 per tape | $19.95 per tape | $59.99 for 2 tapes $279.99 for 10 tapes $559.99 for 20 tapes $1099.99 for 40 tapes | Start at $58.97 for 2 items | $65 - $600 (depends on the package size) | $22.99 per tape |
Film Conversion Price | $14.99 per 50ft. | Starting at 19¢ per foot for 8mm, and 25¢ for 16mm | $59.99 for 2 films $279.99 for 10 films $559.99 for 20 films $1099.99 for 40 films | Start at $58.97 for 2 items | $65 - $600 (depends on the package size) | $0.34 per foot |
Photo Conversion Price | $0.49 per photo | Starting at 13¢ per scan ($25 minimum) | $59.99 for 2 sets of 25 pictures $279.99 for 10 sets of 25 pictures $559.99 for 20 sets of 25 pictures $1099.99 for 40 sets of 25 pictures | Start at $58.97 for 2 items | $65 - $600 (depends on the package size) | $0.48 per photo $0.48 per slide $0.48 per negative |
Audio Conversion Price | N/A | N/A | $59.99 for 2 audio items $279.99 for 10 audio items $559.99 for 20 audio items $1099.99 for 40 audio items | Start at $58.97 for 2 items | $65 - $600 (depends on the package size) | $22.99 per audio cassette $0.30 per feet of reel tapes |
How to Scan Film Negatives at Home - DIY Methods
There are several ways for those who want to scan their negatives at home, and we are going to list them by convenience and quality.
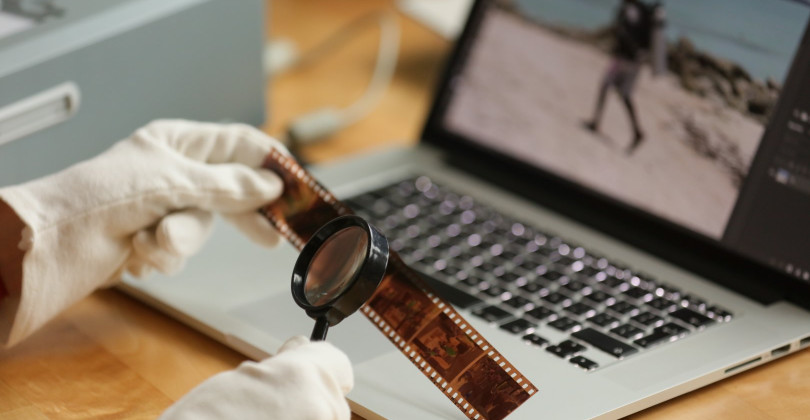
Before starting any DIY methods, clean the negatives and the scanner glass to avoid any dust or smudges that can degrade the scan quality. For wiping film, you can use 98% isopropyl alcohol and avoid using ordinary rubbing alcohol as it creates streaks on the surface. You can use a soft brush or an air blower for the negatives and a microfiber cloth for the scanner glass.
Dedicated Negative Film Scanners
Dedicated negative film scanners are specifically designed to scan negative films, offering superior results compared to traditional scanners. These specialized scanners boast higher resolution and dynamic range, ensuring that your scans capture intricate details and vibrant colors. Typically, they scan one frame at a time, further enhancing the precision of the process.
Many dedicated film scanners are accompanied by proprietary software that provides a wide range of options for image correction. This software allows you to eliminate imperfections like dust and scratches, perform color correction, and optimize brightness and contrast. However, it's important to note that the quality and user-friendliness of the software can vary among different scanner models.
These scanners are equipped with various types of film and slide holders, making them suitable for scanning slides as well. They can even accommodate older film formats such as 8mm and Super8, expanding their versatility.
Connecting the scanner to your computer via a USB cable enables you to transfer the scanned negatives to your computer for easy viewing and online sharing. Another option is to have the scanned photos automatically saved on an SD card for convenient access.
Depending on the brand and model of the scanner, you may also have the option to connect it to a TV for previewing your photos through the TV out connection. This feature can be particularly useful for reviewing your scanned images on a larger screen.
In terms of usability, most dedicated film scanners feature intuitive interfaces that are easy to navigate. They typically do not require extensive learning or technical expertise, allowing you to quickly start scanning your negatives without hassle.
Scanners for Negative, Positive Films and Slides
DigitNow Negative and Slide Scanner | DigitNow Slide and Film Converter | DigitNow Film Scanner | |
 |  |  | |
Website Link | |||
Compatible Films | Black and white film | 35mm film/slide, 110 slide, 126 slide, 110 film, 126 film, Super 8 film | 35mm film/slide |
Scan Resolution | 14MP or 22MP | The scanner's 14MP sensor can optionally enhance images up to 22MP for increased detail. | 14MP or 22MP |
Included film holders/adapters | 135 negative adapter | Positive film holder | 35mm, 110 and 126 adapters for negatives, slides and Super8 film |
Display | 5” LCD large screen | 4.3" LCD Screen | 2.4” color LCD |
Memory | SD card (not included) | SD card 128GB Max (not included) and 128MB internal memory | The internal memory of 128MB and SD card up to 32GB (not included) |
File Format | JPG | JPG | JPG |
TV Out | Yes | Yes | Yes |
USB Connection | Yes | Yes | Yes |
Scanning Negatives With Flatbed Scanner
Scanning negatives with a flatbed scanner is a popular DIY option that offers convenience and accessibility, especially if you already own a flatbed scanner or can acquire one at a reasonable price. While flatbed scanners are commonly used for high-quality scanning of photo prints, it's important to note that you will need a film holder specifically designed for negatives.
The image quality obtained through flatbed scanning depends largely on the scanner's quality. Generally, dedicated film scanners provide higher-quality results compared to standard flatbed scanners. However, with a decent flatbed scanner, you can still achieve satisfactory results for most purposes.
Flatbed scanners are beginner-friendly, as the process involves placing the film in a holder, positioning it on the scan table, adjusting the scanner settings, and initiating the scan. To configure the settings, you can access the scanner software and choose the appropriate scan mode such as "Transparency" or "Film," depending on your scanner model. A resolution of 2400 dpi to 3200 dpi is typically sufficient for most scanning needs. Keep in mind that scanning using this method and these settings can take a few minutes per scan.
When it comes to correcting and enhancing the scanned film, you will need to utilize photo editing software such as Adobe Photoshop or Lightroom. However, these software programs have a learning curve and may not be user-friendly for everyone. Alternatively, you have the option to upload your scans to online platforms and avail professional retouching services. This is particularly useful for fragile old photos that require restoration but may not be suitable for sending to a professional service.
Ultimately, flatbed scanning allows you to obtain digital copies of your negatives. For optimal quality, it is recommended to save the scanned images in a lossless format such as TIFF.
Please keep in mind that the specific process may vary slightly depending on the make and model of your scanner, as well as the accompanying software. Always refer to the user manual provided with your scanner for detailed instructions.
Scanning With DSLR/Mirrorless Camera
DSLR/Mirrorless camera scanning is a widely adopted DIY method for digitizing film negatives, offering photographers a high level of control and the potential for excellent output quality.
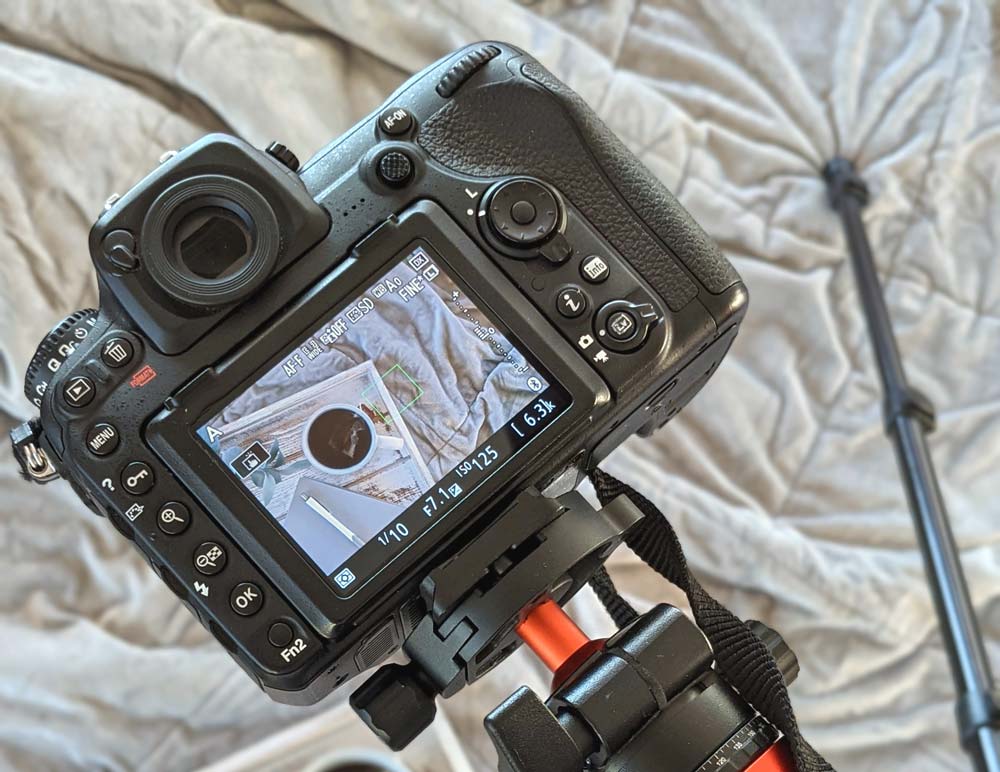
To perform DSLR/Mirrorless camera scanning, you'll need the following equipment: a digital camera (DSLR or mirrorless), a macro lens capable of 1:1 magnification, a light source (such as a light pad or light table), and a film holder or copy stand.
| Step | Procedure |
|---|---|
| 1. Equipment Preparation | Ensure your digital camera, macro lens, light source, and film holder or copy stand are all ready for use. |
| 2. Setting up the Light Source | Position the light source in a way that provides even illumination across the film negative. Take care to avoid any direct light hitting the camera lens, as this can cause unwanted glare or reflections. |
| 3. Positioning the Film | Secure the film negative onto the light source using the film holder, ensuring it lies flat and is correctly aligned. |
| 4. Camera Setup | Place your camera on the copy stand, directly above the film. It's crucial to position the camera perfectly perpendicular to the film surface to prevent distortion. |
| 5. Focusing | Utilizing the macro lens, manually focus on the individual grains of the film to achieve sharpness. |
| 6. Camera Settings | Adjust the camera settings for optimal results. Select a low ISO setting to minimize noise, use a small aperture (high f-number) to maximize sharpness, and adjust the shutter speed to achieve the correct exposure. |
| 7. Taking the Picture | Once all settings are in place, capture the image. To avoid camera shake, it's recommended to use a remote trigger or the timer function of the camera. |
| 8. Post-Processing | Transfer the captured image to your computer for further processing. Invert the colors from negative to positive using photo editing software. Additionally, you can fine-tune other parameters like contrast, brightness, and color balance to achieve the desired result. |
By following these steps, you can successfully digitize your film negatives using a DSLR/Mirrorless camera scanning technique. This method offers flexibility and control, allowing you to achieve high-quality results while retaining creative input throughout the process.

Abdo is a Zoopy writer who loves spending his free time outdoors, camping, and enjoying the peace that nature brings. He also enjoys fixing things - he's particularly good with electronics. His favorite movie is I Am Legend, and he's fascinated by survival gear and safety.